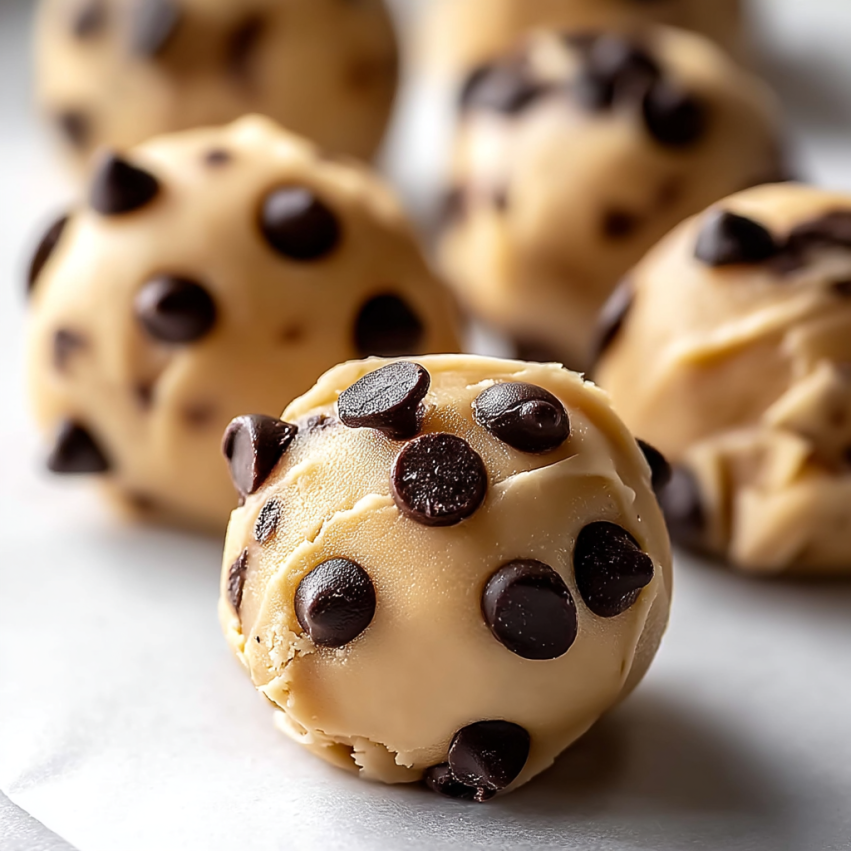
There’s something magical about opening the freezer on a warm afternoon and finding a stash of homemade treats waiting for you. I first made these Frozen Greek Yogurt Peanut Butter Bites during a particularly hot summer when I was craving something sweet but didn’t want the guilt that comes with traditional desserts. What started as an experiment quickly became my go-to snack for satisfying my sweet tooth while still feeling good about what I was eating. The combination of creamy peanut butter, tangy Greek yogurt, and those delightful pockets of chocolate chips creates a flavor experience that’s both indulgent and surprisingly wholesome.
These little bites have become a staple in my freezer, and I often make a double batch because they disappear so quickly. Whether you’re looking for a post-workout snack, a healthier dessert option, or just something to satisfy those afternoon cravings, these bites check all the boxes.
Why You’ll Love This Recipe
Quick and Easy Preparation: Unlike many frozen treats that require specialized equipment or complicated techniques, these bites come together in just minutes. You’ll only need one bowl and a spoon to create this delicious snack. The simplicity of the recipe means you can whip up a batch even on your busiest days.
Protein-Packed Goodness: Thanks to the Greek yogurt and peanut butter, each bite delivers a satisfying dose of protein. This makes them perfect for refueling after a workout or keeping you energized between meals. Instead of reaching for empty-calorie snacks, you’re giving your body something nutritious.
Customizable to Your Taste: The base recipe is just the beginning of what you can create. From different nut butters to various mix-ins, these bites adapt to whatever flavors you’re craving. Additionally, you can adjust the sweetness level to match your preferences perfectly.
Budget-Friendly: With just a handful of pantry staples, you can create a whole batch of these treats for a fraction of what you’d pay for store-bought frozen desserts. Furthermore, you’ll know exactly what’s going into your food without any mysterious additives or preservatives.
Kid-Approved: These bites have won over even the pickiest eaters in my household. Children love the fun, bite-sized format and the sweet taste, while parents appreciate the nutritious ingredients hiding inside.
Ingredients You’ll Need
Main Components
- 1 cup plain Greek yogurt – The foundation of this recipe, providing tanginess and protein
- 1/2 cup creamy peanut butter – Adds richness and that irresistible nutty flavor
- 1/4 cup honey – Natural sweetness that complements the other flavors beautifully
- 1 teaspoon vanilla extract – Enhances all the flavors and adds depth
- 1/2 cup mini chocolate chips – Those delightful bursts of chocolate in every bite
- 1/4 teaspoon sea salt – Balances the sweetness and makes the flavors pop
For Serving
- Fresh berries for pairing
- A drizzle of melted dark chocolate
- Crushed nuts for rolling
- Coconut flakes for texture
Step-by-Step Instructions
Preparing Your Mixture
Start by gathering all your ingredients and a medium mixing bowl. Combine the Greek yogurt, peanut butter, honey, vanilla extract, and sea salt in the bowl. Using a sturdy spoon or spatula, mix these ingredients together until you achieve a smooth, creamy consistency. The mixture should be well blended with no streaks of peanut butter visible. This process typically takes about 2-3 minutes of good mixing.
Once your base is smooth, gently fold in the mini chocolate chips. Make sure to distribute them evenly throughout the mixture so every bite gets those chocolatey surprises. Be careful not to overmix at this stage, as you want to maintain the texture of the chocolate chips.
Forming Your Bites
Line a baking sheet with parchment paper, making sure it lies flat against the surface. This step prevents the bites from sticking and makes cleanup a breeze. Using a tablespoon, scoop out portions of the mixture and drop them onto your prepared baking sheet. Aim for uniform sizes so they freeze evenly, though don’t worry about making them perfectly round—their rustic appearance adds to their homemade charm.
Space the bites about an inch apart on the sheet. They won’t spread during freezing, but this spacing makes them easier to remove later. If your mixture seems too soft to scoop, pop the bowl in the refrigerator for 10-15 minutes to firm up slightly.
Freezing and Storage
Transfer your baking sheet to the freezer, placing it on a flat surface where it won’t be disturbed. Let the bites freeze for at least 2 hours, though overnight works even better for achieving that perfectly firm texture. The bites are ready when they’re solid to the touch and hold their shape when lifted.
After the initial freeze, transfer the bites to an airtight container or zip-top freezer bag. Layer them with parchment paper between each layer if you’re stacking them to prevent sticking. Properly stored, these treats will keep in your freezer for up to 3 months, though I doubt they’ll last that long!
Serving Suggestions
These frozen bites are incredibly versatile when it comes to serving. Enjoy them straight from the freezer for a quick snack, or let them sit at room temperature for 5 minutes to achieve a slightly softer, creamier texture. I love pairing them with fresh strawberries or raspberries for a refreshing dessert combination.
For a more indulgent presentation, drizzle melted dark chocolate over the frozen bites and return them to the freezer for a few minutes to set. You can also roll them in crushed nuts, coconut flakes, or even crushed graham crackers before the initial freeze for added texture and flavor. They make wonderful additions to a dessert platter at gatherings, and guests are always surprised when you tell them how simple they are to make.
Consider serving them alongside a cup of hot coffee or tea for a delightful contrast of temperatures. The combination of the cold, creamy bite with a warm beverage creates a satisfying treat experience.
Creative Variations to Try
Chocolate Lover’s Version
Transform these bites into a chocolate dream by adding 2 tablespoons of cocoa powder to the base mixture. This creates a rich, chocolatey flavor that complements the peanut butter beautifully. Alternatively, you could use chocolate Greek yogurt instead of plain for an extra chocolate boost.
Almond Joy Inspired
Swap the peanut butter for almond butter and add 1/4 cup of shredded coconut to the mixture. Top with a piece of dark chocolate before freezing for a homemade candy bar experience. This variation has become a favorite among my friends who love coconut.
Berry Bliss
Fold in 1/2 cup of freeze-dried strawberries or raspberries along with (or instead of) the chocolate chips. The fruit adds a beautiful color and a tart flavor that balances the sweetness perfectly. You could also swirl in a tablespoon of fruit jam before scooping for a marbled effect.
Crunchy Peanut Butter Twist
Use crunchy peanut butter instead of creamy and add an extra tablespoon of chopped peanuts for even more texture. This variation is perfect for those who love a good crunch with their treats.
Maple Pecan Delight
Replace the honey with pure maple syrup and substitute the peanut butter with pecan butter. Add some chopped pecans instead of chocolate chips for a sophisticated, autumn-inspired flavor profile.
Make-Ahead Tips
These frozen bites are naturally a make-ahead treat, but here are some strategies to maximize your prep time. Consider dedicating an hour on Sunday to make multiple batches in different flavors. Store each variety in separate labeled containers so you have options throughout the week.
If you’re hosting a party, make these bites up to a month in advance. They actually improve in texture after a few days in the freezer as the flavors meld together. Just remember to pull them out of the freezer about 5 minutes before serving for optimal texture.
For busy mornings, portion them into small containers as grab-and-go breakfast options. Pair them with some fruit and nuts for a balanced meal that travels well. You can also pack them in lunch boxes with an ice pack—they’ll thaw to a perfect consistency by lunchtime.
Important Notes
Peanut Butter Consistency Matters: If your peanut butter is the natural kind that separates, make sure to stir it thoroughly before measuring. The oils need to be well incorporated for the right texture in your bites. Natural peanut butter works beautifully in this recipe, but the mixture may be slightly softer than when using conventional peanut butter.
Sweetness Adjustments: The honey amount in this recipe creates a moderately sweet treat. Feel free to reduce it to 2-3 tablespoons if you prefer less sweetness, or increase it slightly if you have a serious sweet tooth. Taste your mixture before freezing and adjust to your preference.
Greek Yogurt Selection: Full-fat Greek yogurt will give you the creamiest results, but 2% or non-fat versions work well too. However, avoid using regular yogurt as it’s too thin and won’t freeze properly. The thickness of Greek yogurt is essential for the right texture.
Chocolate Chip Size: Mini chocolate chips distribute better throughout the mixture than regular-sized chips. If you only have regular chips, consider chopping them into smaller pieces. Dark chocolate chips work wonderfully if you prefer less sweet chocolate.
Nut-Free Options: For those with peanut allergies, sunflower seed butter makes an excellent substitute and creates a nut-free treat. Alternatively, try tahini for a unique sesame flavor that’s surprisingly delicious with the honey and chocolate.
Frequently Asked Questions
How long do these bites last in the freezer?
These bites will stay fresh in the freezer for up to 3 months when stored properly in an airtight container. However, for the best flavor and texture, I recommend enjoying them within 4-6 weeks. Make sure your container is truly airtight to prevent freezer burn, which can affect the taste over time.
Can I use flavored Greek yogurt instead of plain?
Absolutely! Vanilla or honey-flavored Greek yogurt works wonderfully and adds an extra layer of flavor. Just keep in mind that flavored yogurts are sweeter, so you may want to reduce the honey slightly. I’ve also had great success with coffee-flavored Greek yogurt for a mocha-inspired treat.
Why are my bites too hard to bite into?
If your bites freeze rock-solid, simply let them sit at room temperature for 3-5 minutes before eating. The exact time depends on your freezer’s temperature and the size of your bites. Alternatively, using full-fat Greek yogurt instead of non-fat creates a creamier texture that’s less icy when frozen.
Can I make these without honey?
Yes, you have several alternatives! Maple syrup, agave nectar, or even date syrup work beautifully in this recipe. For a sugar-free version, try using a couple of tablespoons of mashed banana or a sugar substitute designed for freezing. Each option will create a slightly different flavor profile, so choose based on your preferences.
Do I need to use parchment paper, or will wax paper work?
Parchment paper is definitely preferred because it doesn’t stick to frozen items as much as wax paper can. However, in a pinch, you can use a silicone baking mat or even lightly grease your baking sheet with coconut oil. The goal is simply to prevent sticking during the initial freeze.
Can I make these bites bigger or smaller?
Definitely! Feel free to use a teaspoon for mini bites or a cookie scoop for larger portions. Just remember that the freezing time may need adjustment—smaller bites freeze faster, while larger ones need more time. Personally, I find that tablespoon-sized bites are perfect for portion control while still being satisfying.
My mixture is too runny—what went wrong?
This usually happens if your peanut butter was too warm or if you used regular yogurt instead of Greek yogurt. Try refrigerating the mixture for 30 minutes to firm it up before scooping. Next time, make sure your peanut butter is at room temperature (not warm) and your yogurt is straight from the refrigerator.
Can I add protein powder to make these even more nutritious?
Yes, you can add 1-2 tablespoons of your favorite protein powder to the mixture. However, protein powder absorbs liquid, so you may need to add a splash of milk or extra yogurt to maintain the right consistency. Vanilla or chocolate protein powder works best with the existing flavors.
Nutrition Information (per bite)
- Serving: 1 bite
- Calories: 90kcal
- Carbohydrates: 10g
- Protein: 4g
- Fat: 5g
- Saturated Fat: 1g
- Polyunsaturated Fat: 4g
- Sodium: 50mg
- Fiber: 1g
- Sugar: 5g