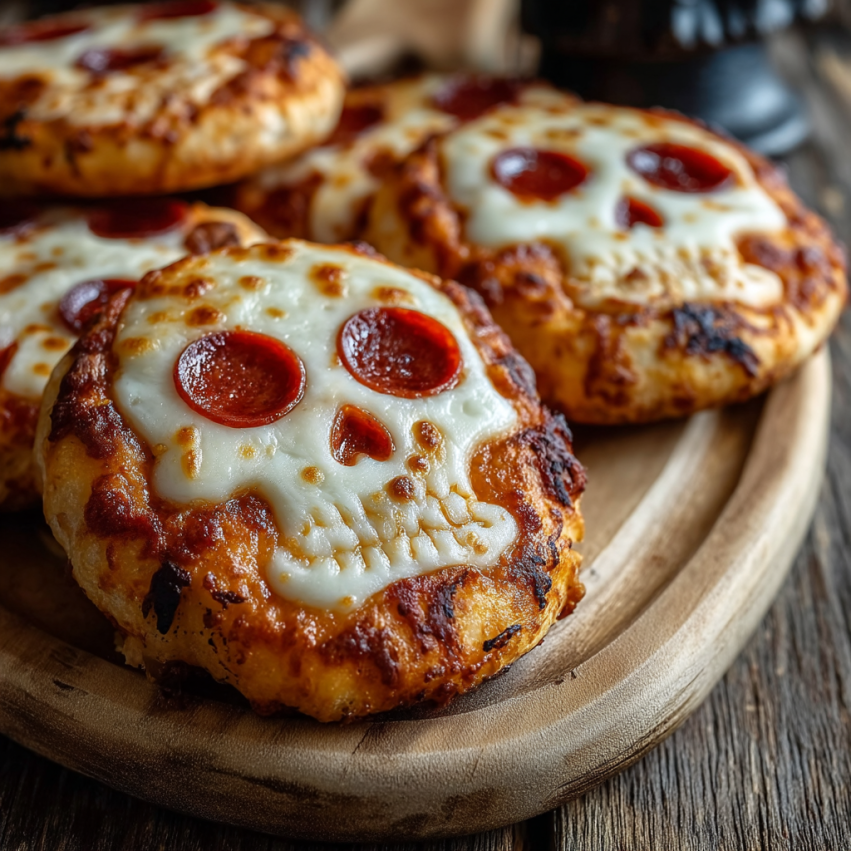
I’ll never forget the first time I served these pizza skulls at my Halloween party three years ago. My nephew walked into the kitchen, spotted them on the counter, and his eyes went as wide as saucers. “Are those… pizza SKULLS?!” he gasped, immediately reaching for one despite them being fresh out of the oven. That reaction alone made all the effort worthwhile, and honestly, these little beauties have become my go-to Halloween appetizer ever since.
There’s something magical about combining everyone’s favorite comfort food with spooky season aesthetics. These aren’t just gimmicky party snacks – they’re genuinely delicious pizza pockets that happen to look hauntingly cool. Whether you’re hosting a costume party, planning a horror movie marathon, or just want to make dinner more festive, these pizza skulls deliver on both flavor and fun.
Why You’ll Love This Recipe
They’re Surprisingly Simple
Despite their impressive appearance, pizza skulls require minimal cooking skills and use store-bought dough as a shortcut. You don’t need to be a master baker or have any special culinary training to pull these off successfully.
Perfect for Crowds
Each batch makes six substantial servings, and the recipe scales up beautifully when you’re feeding a hungry Halloween crowd. Plus, they’re finger food, which means no plates or utensils required – always a win at parties.
Customization Heaven
The basic recipe is just a starting point. From there, you can adapt the fillings to accommodate different dietary preferences, spice levels, and flavor profiles. Vegetarians, meat lovers, and spice enthusiasts can all find their perfect version.
Make-Ahead Friendly
Busy party hosts will appreciate that these can be assembled hours in advance or even frozen for future use. This flexibility takes the stress out of party preparation and lets you enjoy your own event.
Kid-Approved with Adult Appeal
Children love the fun skull shapes and familiar pizza flavors, while adults appreciate the quality ingredients and creative presentation. It’s genuinely one of those rare recipes that bridges the age gap effortlessly.
Essential Ingredients
For the Pizza Skulls Base
- 1 (13.8 oz) can refrigerated pizza dough (room temperature works best)
- 6 tbsp pizza sauce (use thick sauce to prevent soggy bottoms)
- 1½ cups shredded mozzarella cheese, divided
- ¼ cup cooked Italian sausage, crumbled and cooled
- 24 slices pepperoni, chopped into small pieces
- Non-stick cooking spray
Optional Flavor Enhancements
- 2 tbsp garlic butter for brushing
- ½ tsp Italian seasoning
- ¼ cup grated Parmesan cheese
- Red pepper flakes to taste
For Serving
- Warm marinara sauce for dipping
- Fresh basil leaves for garnish
- Grated Parmesan for sprinkling
Step-by-Step Instructions
Preparing Your Workspace
Preheat your oven to 375°F (190°C) and generously spray your skull-shaped cake pan with non-stick spray, paying special attention to all the detailed crevices. If you don’t have skull molds, standard muffin tins work perfectly as an alternative. Set your prepared pan aside while you work with the dough.
Working with the Dough
Remove the pizza dough from the refrigerator 15-20 minutes before use to make it easier to handle. Once it’s slightly warmed, roll the dough on a lightly floured surface into a 15×10-inch rectangle, then cut it into 6 equal strips using a sharp knife or pizza cutter. Keep unused strips covered with a damp towel to prevent drying.
Forming the Skull Shapes
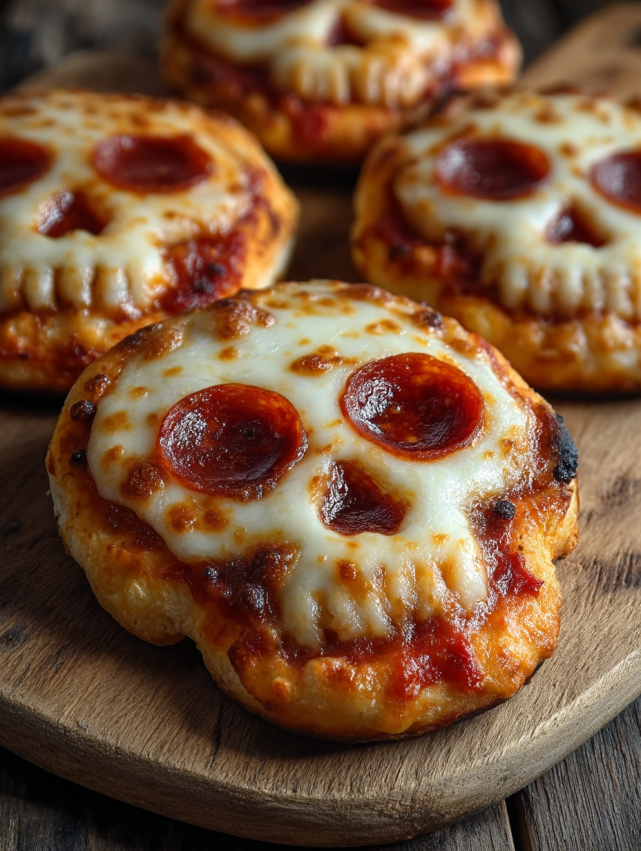
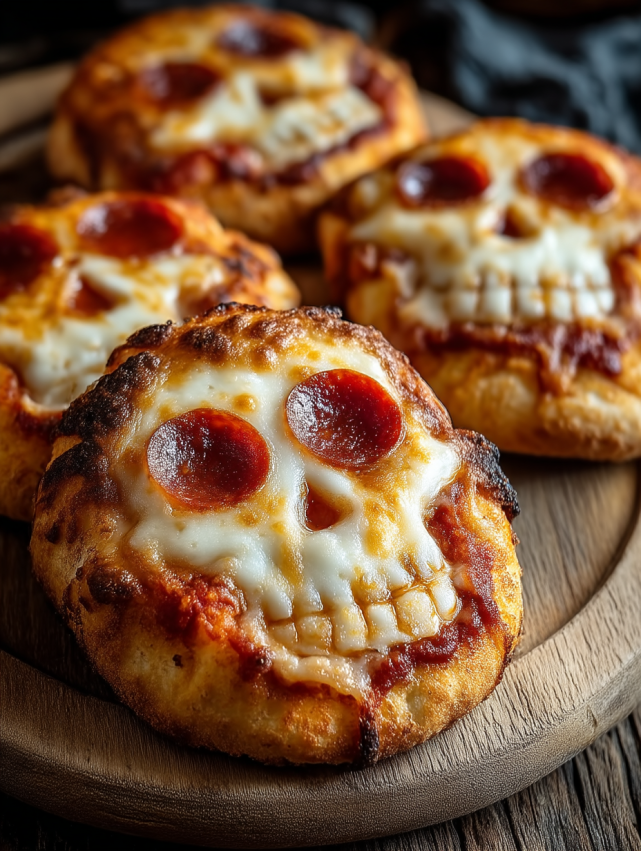
Carefully press each dough strip into a skull mold, ensuring complete coverage of the bottom and sides. The dough should come up the sides with some excess hanging over the edges – this excess will be used to seal the filled pockets later. Don’t worry if it’s not perfect; the dough is forgiving and will adjust during baking.
Creating the Perfect Filling
Layer the ingredients strategically for the best results: start with a layer of mozzarella cheese at the bottom, followed by a tablespoon of pizza sauce, then the chopped pepperoni and crumbled sausage. Finally, top with additional mozzarella to create that irresistible cheese pull when bitten into. Avoid overfilling, as this can cause the skulls to burst open during baking.
Sealing and Finishing
Fold the excess dough over the filling and press the edges firmly to create a tight seal. This step is crucial to prevent the filling from leaking during baking. For extra flavor, brush the tops with garlic butter and sprinkle with Italian seasoning. A light dusting of Parmesan adds a beautiful golden finish.
Baking to Golden Perfection
Bake for 18-20 minutes until the crust turns golden brown and feels firm to the touch. The internal temperature should reach 165°F (74°C) for food safety. Allow them to cool for 3-4 minutes before carefully removing from the molds to prevent the hot filling from spilling out. Use a butter knife to gently loosen the edges if needed.
Creative Serving Suggestions
Spooky Presentation Ideas
Arrange the pizza skulls on a dark serving platter surrounded by “blood” (warm marinara sauce) in small bowls for dipping. Additionally, garnish with fresh basil leaves positioned like “grass” growing around the skulls for an authentic graveyard effect. Dry ice in the background creates an extra eerie atmosphere, though keep it away from food and direct contact.
Interactive Serving Station
Create a DIY pizza skull bar where guests can customize their own fillings before baking. Provide small bowls of various toppings like mushrooms, olives, jalapeños, and different cheeses for personalized creations. This interactive element turns food preparation into part of the entertainment.
Themed Accompaniments
Serve alongside “witch fingers” (breadsticks), “spider eggs” (black olives), and “poison” (dark sodas or Halloween-themed cocktails) to create a complete spooky meal experience. Consider adding “mummy dogs” (hot dogs wrapped in crescent roll strips) to round out your Halloween spread.
Delicious Recipe Variations
Meat Lovers Version
Combine Italian sausage, pepperoni, bacon bits, and ham for the ultimate carnivore’s delight. Add extra mozzarella to balance the rich meat flavors and prevent the filling from becoming too dense. A sprinkle of crushed red pepper flakes gives these skulls a subtle heat that complements the savory meats perfectly.
Vegetarian Halloween Skulls
Fill with roasted vegetables like bell peppers, mushrooms, onions, and sun-dried tomatoes. Ricotta cheese mixed with Italian herbs creates a creamy, flavorful base that complements the vegetables beautifully. Fresh spinach wilted with garlic adds both nutrition and vibrant color to the filling.
Spicy Demon Skulls
Add jalapeños, hot Italian sausage, and a dash of hot sauce to the filling. Instead of regular mozzarella, use pepper jack cheese for an extra kick that will make these skulls truly devilish. Serve with a spicy sriracha-mayo dipping sauce for those who really want to turn up the heat.
Mediterranean Twist
Combine feta cheese, kalamata olives, roasted red peppers, and spinach for a sophisticated flavor profile. A touch of oregano and lemon zest brightens the entire filling, transforming these from classic pizza pockets into something more refined and unexpected.
Make-Ahead Tips
Assembly Strategy
Assemble the pizza skulls completely up to 4 hours before baking and store them covered in the refrigerator. This actually improves the flavors as the ingredients have time to meld together. Just remember to add about 2-3 extra minutes to the baking time if you’re starting with cold skulls.
Freezing Guidelines
Unbaked pizza skulls freeze excellently for up to one month when wrapped individually in plastic wrap and stored in freezer bags. Bake directly from frozen, adding 5-7 additional minutes to the cooking time. Label each bag with the date and filling type so you can grab exactly what you want later.
Reheating Excellence
Leftover pizza skulls taste best when reheated in a 350°F (175°C) oven for 8-10 minutes until heated through and crispy. Avoid microwaving, which can make the crust soggy and unappealing. For best results, place them on a wire rack over a baking sheet to allow air circulation and maintain crispiness on all sides.
Important Notes
Dough Temperature Matters
Room temperature dough is significantly easier to work with than cold dough straight from the refrigerator. However, if your dough becomes too warm and sticky, pop it back in the fridge for 10 minutes to firm up before continuing.
Sauce Thickness is Key
Using a thick pizza sauce or even tomato paste prevents the bottoms from getting soggy. If your sauce seems watery, simmer it for a few minutes to reduce excess moisture before assembling your skulls.
Don’t Skip the Cooling Time
Those few minutes of cooling after baking aren’t optional – the filling is molten hot and needs time to set slightly. Otherwise, you’ll end up with a delicious but messy situation when you try to remove them from the molds.
Mold Alternatives
No skull molds? No problem. Standard muffin tins, mini loaf pans, or even hand-shaped calzones work beautifully. The skulls look amazing, but the flavor remains fantastic regardless of shape.
Cheese Quality Counts
While pre-shredded cheese is convenient, freshly shredded mozzarella melts better and creates that coveted cheese pull. Pre-shredded varieties contain anti-caking agents that can affect texture, so grate your own if you have time.
Frequently Asked Questions
Can I use homemade pizza dough instead of store-bought?
Absolutely! Homemade dough works wonderfully and often tastes even better. Just roll it to similar dimensions and proceed with the recipe as written. Keep in mind that homemade dough may require slightly adjusted baking times depending on thickness.
What if I don’t have skull-shaped molds?
Standard muffin tins are perfect substitutes and create adorable pizza cups. You can also shape these freeform on a baking sheet like traditional calzones. The skull shape is fun for Halloween, but these taste delicious regardless of appearance.
How do I prevent the filling from leaking out?
Make sure to seal the edges completely and don’t overfill each cavity. Pressing the dough edges firmly together creates a good seal. Also, using thick sauce rather than watery marinara prevents breakthrough during baking.
Can I make these gluten-free?
Yes, substitute with your favorite gluten-free pizza dough. Most store-bought gluten-free doughs work well, though they may be slightly more delicate to handle. Handle gently and expect a slightly different texture in the final product.
How long do leftovers last?
Store cooled pizza skulls in an airtight container in the refrigerator for up to 3 days. Reheat in the oven for best results. They also freeze well for up to one month when properly wrapped.
What’s the best way to transport these to a party?
Transport them in a single layer in a container to prevent crushing. If possible, reheat them at your destination for the best texture. Alternatively, bring them at room temperature and provide reheating instructions for your host.
Can kids help make these?
Definitely! Children love pressing the dough into molds and adding fillings. Just supervise the hot oven parts and the handling of hot pans. This is a fantastic recipe for getting kids excited about cooking and Halloween simultaneously.
What other holidays could these work for?
While skull molds are Halloween-specific, the concept works year-round with different mold shapes. Use heart molds for Valentine’s Day, star molds for Fourth of July, or simply make them in muffin tins for any occasion. The delicious pizza pocket concept transcends holidays!