There’s something magical about watching my kids’ faces light up when I bring this mummy meatloaf to the Halloween dinner table. I still remember the first time I made it—my daughter actually shrieked with delight, and my son immediately started taking pictures before we even served it. What began as a desperate attempt to make dinner festive during a particularly chaotic October has become our most requested Halloween tradition. Every year, friends ask if we’re making “that creepy meatloaf thing” again, and honestly, I can’t imagine celebrating without it now.
Why This Mummy Meatloaf Will Become Your Halloween Tradition
This isn’t just another themed recipe that looks cute but tastes mediocre. The meatloaf itself is genuinely delicious—moist, flavorful, and comforting in that classic way that makes you want seconds. Meanwhile, the puff pastry adds an unexpected gourmet touch that elevates it beyond ordinary weeknight fare.
What I love most is how forgiving this recipe is. Unlike fussy decorated cookies or temperamental fondant cakes, this mummy comes together without requiring professional decorating skills. Even if your pastry strips look slightly messy, it just adds to the ancient, wrapped-in-haste aesthetic that makes mummies so perfectly spooky.
Plus, kids absolutely adore helping with this one. They can mix ingredients, wrap the pastry strips, and place those olive eyes with such serious concentration you’d think they were performing actual mummy preservation. It’s become as much about the experience as the eating in our house.
Gathering Your Mummy-Making Ingredients
Core Meatloaf Foundation
The base of our mummy starts with classic meatloaf ingredients that create the perfect texture and flavor:
- 1 lb ground beef (80/20 blend provides ideal moisture and flavor)
- 1/2 cup breadcrumbs (panko or regular both work perfectly)
- 1/2 cup milk (helps create tender texture and binds ingredients)
- 1 egg (essential for binding and structure)
- 1 small onion, finely chopped (adds moisture and depth of flavor)
- 2 cloves garlic, minced (fresh garlic makes a noticeable difference)
Flavor Enhancement Elements
These ingredients transform basic meatloaf into something truly crave-worthy:
- 1/4 cup ketchup (adds sweetness and moisture to the meat mixture)
- 1 tsp Worcestershire sauce (provides umami depth and complexity)
- Salt and pepper to taste (season generously for best flavor development)
Mummy Transformation Components
Here’s where the magic happens—turning dinner into a Halloween spectacle:
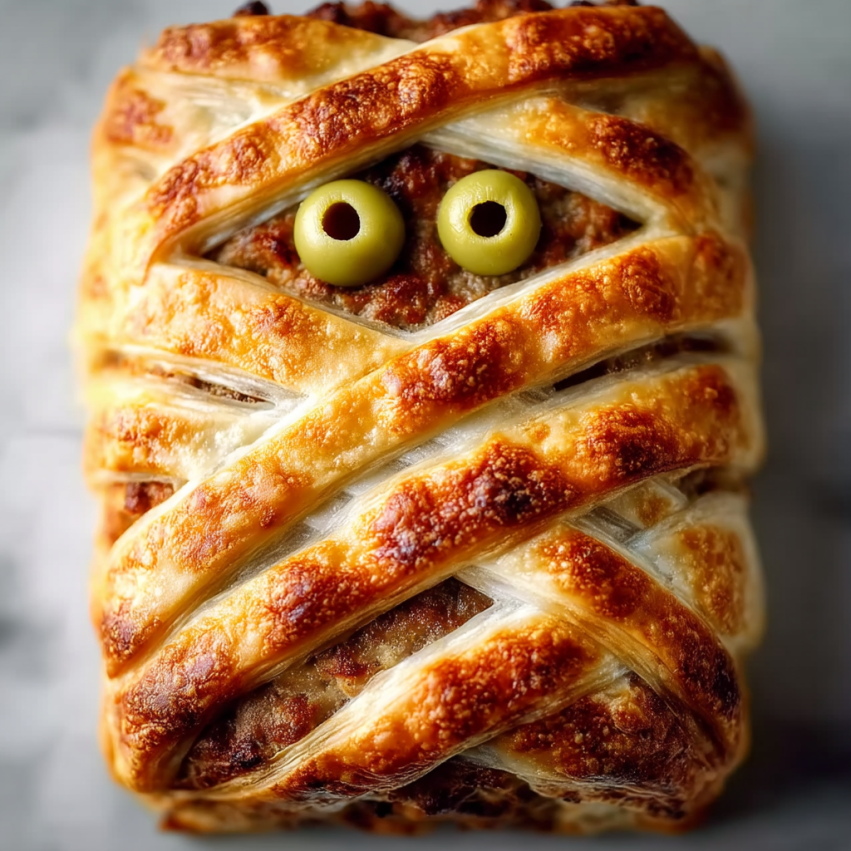
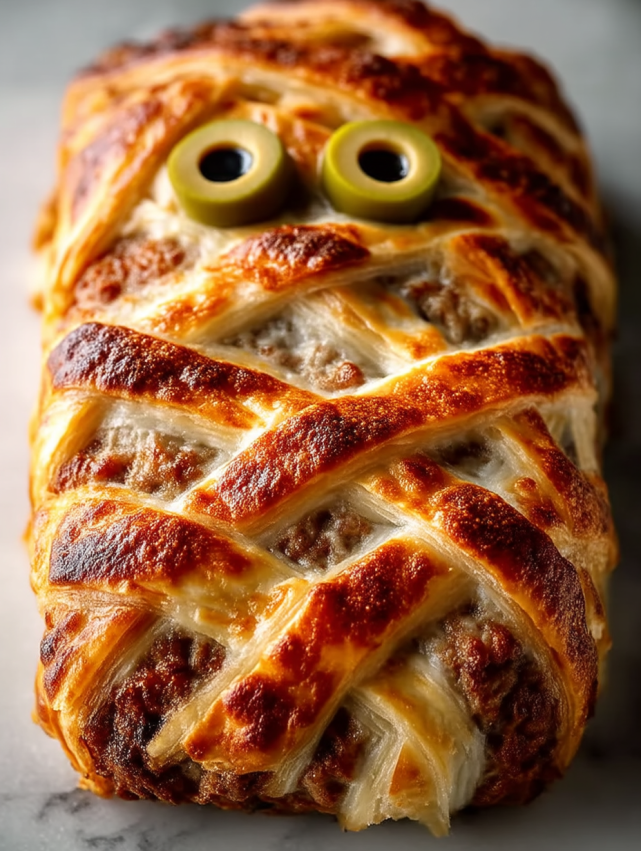
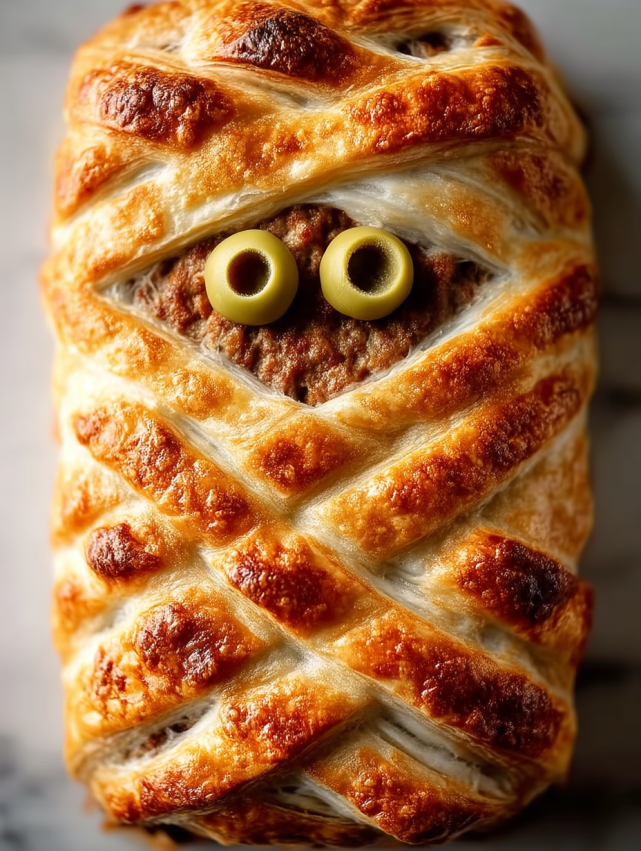
- 1 sheet puff pastry, thawed (creates the authentic bandage appearance)
- 2 black olives (sliced in half for perfectly spooky eyes)
- Marinara sauce for serving (optional “bloody” effect for extra drama)
Essential Equipment
You’ll need these tools to bring your mummy to life:
- Large mixing bowl (for combining meatloaf ingredients thoroughly)
- Greased 9×5-inch loaf pan or baking dish (prevents sticking)
- Sharp knife (for cutting pastry strips and olive halves)
- Pastry brush (optional, for egg wash on pastry)
Step-by-Step Mummy Creation Process
Building the Perfect Meatloaf Base
Step 1: Preheat your oven to 350°F (175°C) and generously grease your baking dish to prevent the meatloaf from sticking. Then, gather all your meatloaf ingredients in one area for efficient mixing. This mise en place approach makes the process smoother and prevents that frantic hunt for ingredients mid-recipe.
Step 2: In a large mixing bowl, gently combine the ground beef, breadcrumbs, milk, egg, finely chopped onion, minced garlic, ketchup, and Worcestershire sauce. Mix just until ingredients are evenly distributed—overmixing creates dense, tough meatloaf that nobody wants. Think of it like you’re folding rather than kneading; your hands work best for this gentle incorporation.
Step 3: Season the mixture generously with salt and pepper, then shape it into an oval loaf that resembles a body lying down. Place the formed meatloaf in your prepared baking dish, ensuring it’s centered for even cooking. Don’t worry about making it perfectly smooth; a slightly rustic surface actually helps the pastry strips adhere better later.
Initial Baking Phase
Step 4: Bake the unwrapped meatloaf for 45 minutes, until it’s cooked through and the internal temperature reaches 160°F. During this time, remove your puff pastry from the freezer to thaw completely if you haven’t already done so. I usually set it on the counter about 30 minutes before I need it, which gives it just enough time to become pliable without getting too warm.
Step 5: Remove the meatloaf from the oven and allow it to cool for 10-15 minutes. This cooling period makes the meatloaf easier to handle and prevents the puff pastry from melting when applied. Trust me on this one—I learned the hard way that hot meatloaf plus cold pastry equals a soupy, disappointing mess.
The Mummy Transformation Magic
Step 6: While the meatloaf cools, cut your thawed puff pastry into strips approximately 1/2 inch wide. You’ll need enough strips to wrap around the entire meatloaf, leaving strategic gaps for the eyes and some wrapped areas. I find that cutting on a lightly floured surface prevents sticking, though you want to use flour sparingly so the strips still stick to each other.
Step 7: Carefully wrap the pastry strips around the cooled meatloaf in a crisscross pattern, creating an authentic mummy bandage appearance. Leave two small spaces near what will be the “head” area for positioning the olive eyes later. The beauty here is that there’s no wrong way to do this—ancient mummy wrappings were never perfectly neat anyway.
Step 8: Ensure the pastry strips overlap slightly and press gently to help them adhere to the meatloaf surface. Don’t worry about perfect placement—mummy bandages should look slightly haphazard and ancient. In fact, some gaps and uneven areas add character and make the whole creation look more authentically tomb-worthy.
Final Baking and Eye Placement
Step 9: Return the wrapped meatloaf to the oven and bake for an additional 15 minutes, until the puff pastry turns golden brown and crispy. Watch carefully during the last few minutes to prevent over-browning. If you notice some areas darkening faster than others, you can tent those spots with foil.
Step 10: Remove from the oven and immediately place the black olive halves in the reserved eye spaces while the pastry is still warm and slightly pliable. The contrast creates perfectly spooky mummy eyes that peer hauntingly from the bandages. This is the moment when everyone in the kitchen inevitably gasps—it’s remarkably lifelike in the creepiest possible way.
Spine-Chilling Serving and Presentation Ideas
Haunted Dinner Table Setup
Serve your mummy on a large black or dark wooden platter surrounded by dry ice (in safe containers) for dramatic smoking effects. Dim the lights and use candles to create an appropriately eerie atmosphere. I’ve found that orange and purple LED candles work beautifully and eliminate fire hazards when kids are around.
Egyptian Tomb Theme
Present the mummy on a bed of couscous or rice pilaf to simulate sand, with small plastic pyramids and toy camels around the platter for complete thematic immersion. You could even print out some hieroglyphics to scatter around the serving area. Last year, my kids made a “sarcophagus” from a shoebox that we positioned nearby, which absolutely made the presentation.
Medical Morgue Presentation
Place the mummy on a stainless steel tray with dramatic lighting from above, complete with “toe tags” made from cardboard for darkly humorous adult Halloween parties. This approach works especially well if you’re hosting friends in the medical field who appreciate the macabre humor.
Family-Friendly Fun
Serve with the marinara sauce in a separate bowl labeled “Ancient Curse Elixir” and let family members decide how much “blood” they want with their mummy portions. Kids love this interactive element, and it prevents the pastry from getting soggy if someone doesn’t want sauce.
Deliciously Spooky Recipe Variations
Turkey Mummy Health Version
Substitute ground turkey for beef and add extra seasonings like Italian herbs and onion powder to compensate for turkey’s milder flavor. Furthermore, this lighter version still wraps beautifully and satisfies health-conscious Halloween celebrants. I recommend increasing the Worcestershire sauce slightly and maybe adding a tablespoon of tomato paste for extra moisture and depth.
Cheese-Stuffed Surprise Mummy
Create a hollow in the center of your meatloaf and fill it with shredded mozzarella before shaping. When sliced, the melted cheese creates a “gooey interior” effect that delights cheese lovers. The first time I tried this, my husband actually said it was the best meatloaf I’d ever made—high praise from someone who’s usually skeptical of “fancy” versions.
Spicy Jalapeño Mummy
Add finely diced jalapeños and a dash of hot sauce to the meat mixture for adults who enjoy heat with their Halloween scares. Additionally, use pepper jack cheese instead of regular cheese if making the stuffed version. This creates a subtle kick that doesn’t overwhelm but definitely wakes up your taste buds.
Breakfast Mummy Variation
Use breakfast sausage instead of ground beef and serve with scrambled eggs and hash browns for a spooky Halloween brunch that works wonderfully for morning parties. I’ve made this for our annual Halloween morning gathering, and it’s become just as popular as the dinner version.
Expert Make-Ahead and Storage Strategies
Advance Preparation Options
Timeline Preparation: Form the raw meatloaf up to 24 hours ahead and refrigerate covered. The flavors actually improve with this resting time, and you can wrap and bake it fresh when ready to serve. This makes hosting so much easier—one less thing to worry about when you’re already juggling a dozen Halloween tasks.
Pastry Preparation: Cut your puff pastry strips in advance and store them between parchment paper in the refrigerator for up to two days. This prep work makes final assembly much faster. I usually do this the morning of my party while I’m having coffee, which makes the evening rush far less stressful.
Day-Of and Storage Tips
Complete Make-Ahead Option: Assemble the entire wrapped mummy up to one day ahead, then bake directly from the refrigerator, adding 10-15 minutes to the final baking time for the cold start. Just be aware that the pastry might not puff quite as dramatically, though it still looks and tastes wonderful.
Leftover Management: Slice and store leftover mummy meatloaf in the refrigerator for up to four days. Reheat individual portions in the microwave, and the puff pastry will still maintain some of its pleasant texture. Honestly, cold mummy meatloaf sandwiches the next day are pretty fantastic too—just saying.
Important Notes for Mummy Success
Pastry Temperature Matters: The most common mistake I see people make is applying the pastry strips when the meatloaf is still too hot. If steam rises when you touch the meatloaf, it needs more cooling time. Otherwise, your beautiful bandages will melt into a disappointing puddle.
Don’t Skip the Cooling Step: Yes, I’m mentioning this twice because it’s that important. That 10-15 minute rest after the initial baking isn’t just for easier handling—it also lets the meatloaf set up properly so it slices beautifully when serving time comes.
Olive Eye Placement: Press the olive halves in gently but firmly while the pastry is warm. If you wait until everything cools completely, they won’t adhere as well. However, don’t press so hard that you break through the pastry layers underneath.
Internal Temperature Check: Always use a meat thermometer to verify your meatloaf reaches 160°F internally before adding the pastry. Nothing ruins Halloween dinner faster than discovering undercooked meat when you slice into your creation.
Frequently Asked Questions
Can I use store-bought meatloaf mix instead of making my own?
Absolutely! If you have a favorite premade meatloaf mix, feel free to use it. The mummy transformation works with any meatloaf recipe you love. I’ve even done this with leftover meatloaf from earlier in the week—just reheat it before wrapping.
What if I don’t have puff pastry?
You could use crescent roll dough cut into strips, though it won’t puff quite as dramatically. Some people have successfully used biscuit dough rolled thin. The texture will be different, but the visual effect still works beautifully for creating that mummy appearance.
How do I prevent the pastry from getting soggy?
The key is making sure your meatloaf isn’t releasing too much moisture. Letting it cool adequately helps, as does not over-saucing the meatloaf before wrapping. If your meatloaf tends to be very juicy, you might drain off excess liquid after the first baking phase.
Can I make this with a different type of meat?
Definitely! Ground pork, chicken, turkey, or even a combination works wonderfully. Just adjust your seasonings accordingly since different meats have varying flavor profiles. Poultry benefits from more assertive seasoning, while pork can handle the recipe as written.
Is this suitable for freezing?
You can freeze the cooked, unwrapped meatloaf for up to three months. However, I don’t recommend freezing it after wrapping with pastry—the texture suffers significantly. Instead, freeze the meatloaf alone, then thaw, warm, and wrap with fresh pastry when you’re ready to serve.
What sides pair best with mummy meatloaf?
Classic comfort sides work beautifully—mashed potatoes (maybe dyed green for “monster mash”), roasted vegetables, or a simple salad. For full Halloween effect, serve “witches’ finger” green beans or “graveyard” mashed potatoes with breadstick tombstones. My kids particularly love sweet potato “pumpkin” mash alongside their mummy slice.