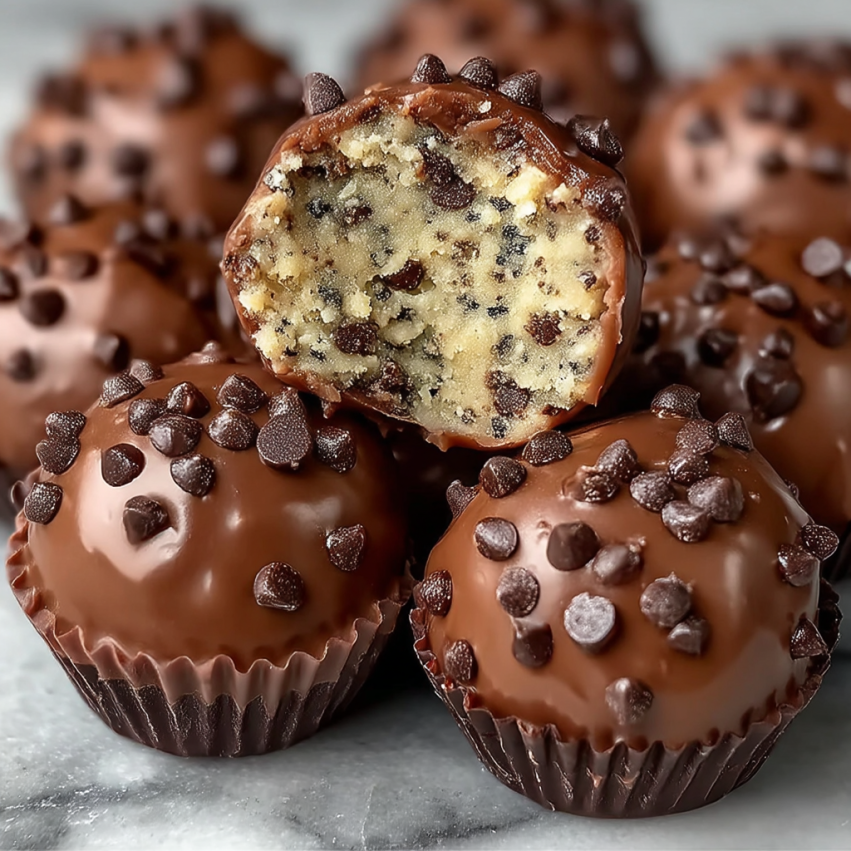
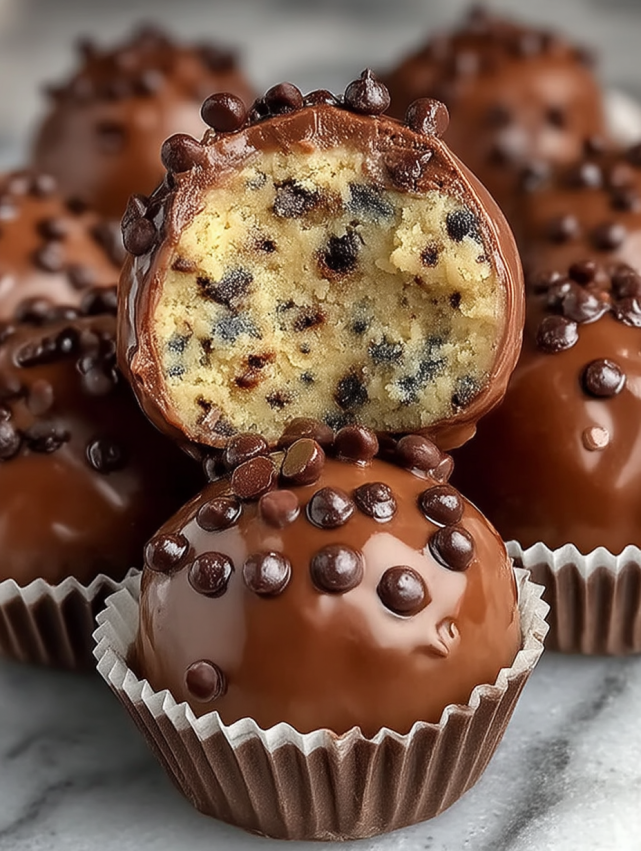
There’s something magical about cookie dough that takes me back to my childhood—sneaking spoonfuls from the mixing bowl when my mom wasn’t looking. Now, as an adult trying to balance my sweet tooth with a healthier lifestyle, I’ve discovered the perfect compromise: these Chocolate Chip Cookie Dough Protein Balls. They capture all that nostalgic cookie dough flavor while packing in protein and nutrients that actually fuel your body.
The best part? You don’t have to feel guilty about eating these straight from the fridge. In fact, I keep a batch in my refrigerator at all times for those afternoon energy slumps or post-workout cravings. My kids think they’re getting a decadent treat, and I know they’re getting quality protein and healthy fats. It’s a win-win that tastes like pure indulgence.
Why You’ll Love This Recipe
No-Bake Convenience
Unlike traditional cookies that require oven time and careful monitoring, these protein balls come together in about 15 minutes of hands-on work. There’s no preheating, no baking sheets to clean, and no waiting for the oven timer. Simply mix, roll, and chill—perfect for busy weeknights or meal prep Sundays.
Protein-Packed Energy
Each bite delivers 5 grams of protein, making these an ideal pre-workout snack or post-gym recovery treat. The combination of protein powder and nut butter provides sustained energy without the sugar crash that comes from regular cookie dough. Additionally, the healthy fats keep you satisfied between meals.
Customizable to Your Dietary Needs
Whether you’re plant-based, gluten-free, or just have specific taste preferences, this recipe adapts beautifully. Swap out the protein powder type, use your favorite nut butter alternative, or even switch to dairy-free chocolate. The formula stays delicious no matter how you modify it.
Kid-Approved Treat
Getting children to eat protein can be a daily battle, but not with these. They look and taste like candy, yet they’re actually nutritious. My kids request these for their lunchboxes, and I’m happy to oblige knowing they’re getting wholesome ingredients instead of processed snacks.
Ingredients
For the Cookie Dough Bites
- 1 cup almond flour (or oat flour)
- 1/2 cup vanilla protein powder (whey, casein, or plant-based)
- 1/4 cup cashew butter (or almond/sunflower seed butter)
- 2–3 tbsp milk (dairy or non-dairy)
- 1/4 cup mini chocolate chips (plus extra for topping)
- 2 tbsp honey or maple syrup
- 1 tsp vanilla extract
- Pinch of salt
For the Chocolate Coating
- 1 cup milk chocolate chips
- 1 tsp coconut oil (or vegetable oil)
Step-by-Step Instructions
Prepare Your Dry Base
Start by whisking together the almond flour, protein powder, and salt in a medium bowl. Make sure there are no clumps of protein powder, as these can create an uneven texture in your finished balls. This dry mixture forms the foundation of your cookie dough flavor.
Create the Wet Mixture
In a separate bowl, combine the cashew butter, 2 tablespoons of milk, honey or maple syrup, and vanilla extract. Stir vigorously until the mixture becomes smooth and well-incorporated. The warmth from stirring will help the nut butter loosen up and blend more easily with the other ingredients.
Bring It All Together
Pour the wet ingredients into the dry mixture, then use a sturdy spoon or spatula to mix everything together. At first, it might seem like there isn’t enough liquid, but keep mixing—the dough will eventually come together. You’re looking for a texture that resembles actual cookie dough.
Add the Chocolate Chips
Gently fold in the mini chocolate chips, distributing them evenly throughout the dough. Don’t overmix at this stage, as you want to maintain the integrity of the chocolate pieces. Reserve a few extra chips for topping later if desired.
Adjust the Texture
Check your dough’s consistency by squeezing a small amount in your palm. If it crumbles and won’t hold together, add the remaining tablespoon of milk. For very dry batches, you might need an extra teaspoon or two. The perfect consistency is slightly sticky but firm enough to hold a ball shape.
Shape Your Protein Balls
Using your hands or a small cookie scoop, portion out the dough and roll it into 1-inch balls. Place each ball on a parchment-lined plate or baking sheet. If the dough sticks to your hands, try wetting them slightly with water or coating them with a tiny bit of coconut oil.
The First Chill
Transfer your plate to the refrigerator and let the balls chill for at least 30 minutes. This firming step is crucial—it makes the coating process much easier and helps the balls maintain their shape. Meanwhile, you can prepare your chocolate coating.
Melt the Chocolate
Combine the chocolate chips and coconut oil in a microwave-safe bowl. Heat in 30-second intervals, stirring thoroughly between each heating. This gradual approach prevents the chocolate from seizing or burning. Once smooth and glossy, your coating is ready.
Coat Each Ball
Remove the chilled protein balls from the fridge. Using a fork or dipping tool, roll each ball in the melted chocolate, allowing excess to drip off. Place the coated balls back on the parchment-lined plate. Work quickly, as the cold balls will start to set the chocolate almost immediately.
Final Touches and Setting
While the chocolate is still wet, sprinkle extra mini chocolate chips on top of each ball for decoration. Return the plate to the refrigerator for 15-20 minutes until the chocolate coating is completely set and firm to the touch.
Serving Suggestions
These protein balls are incredibly versatile when it comes to serving. Enjoy them straight from the fridge as a mid-afternoon pick-me-up, or pack them in your gym bag for a post-workout protein boost. They’re also fantastic alongside your morning coffee as a breakfast supplement.
For a more indulgent presentation, serve these on a dessert platter with fresh berries and a drizzle of extra melted chocolate. They make impressive party treats that look fancy but require minimal effort. Your guests will never guess how healthy they actually are.
Consider pairing them with a glass of cold milk (dairy or non-dairy) for the ultimate cookie-and-milk experience without the guilt. The combination brings out the nostalgic cookie dough flavor even more. Alternatively, crumble one over Greek yogurt for a protein-packed breakfast parfait.
Recipe Variations
Peanut Butter Chocolate Lovers
Replace the cashew butter with natural peanut butter and use chocolate protein powder instead of vanilla. The result is a Reese’s-inspired flavor combination that chocolate and peanut butter fans will devour. Add a few chopped peanuts to the mixture for extra crunch.
Double Chocolate Decadence
Swap the vanilla protein powder for chocolate protein powder and add 2 tablespoons of cocoa powder to the dry ingredients. Use dark chocolate chips instead of milk chocolate for a rich, intensely chocolatey treat. This version is perfect for serious chocolate enthusiasts.
Birthday Cake Style
Use cake batter-flavored protein powder and replace the chocolate chips with rainbow sprinkles. Coat them in white chocolate instead of milk chocolate, then top with extra sprinkles. These festive balls are perfect for celebrations or when you’re craving something fun and colorful.
Mocha Energy Bites
Add 1 tablespoon of instant espresso powder to the dry ingredients for a coffee-infused version. The caffeine boost combined with the protein makes these ideal pre-workout snacks. Keep the chocolate coating for a mocha flavor, or try them without coating for a less sweet option.
Coconut Almond Joy
Fold in 1/4 cup of unsweetened shredded coconut along with the chocolate chips. Use almond butter instead of cashew butter, and coat with dark chocolate. Top each ball with a few coconut flakes and a whole almond for a candy bar-inspired treat.
Make-Ahead Tips
These protein balls are a meal prepper’s dream. I typically make a double batch every Sunday and store them in the fridge for the entire week. They actually taste better after sitting for a day or two, as the flavors have time to meld together.
For longer storage, place the coated and set protein balls in a freezer-safe container with parchment paper between layers. They’ll keep in the freezer for up to three months. Frozen, they have a fudge-like texture that’s absolutely delicious—no thawing required.
If you’re short on time, you can make the balls and skip the chocolate coating entirely. They’re still delicious and will last just as long in the fridge. Save the coating step for when you want to make them extra special or are bringing them to an event.
Notes
Protein Powder Selection
Vanilla protein powder works best as it enhances the authentic cookie dough flavor profile. However, unflavored protein powder is fine if that’s what you have on hand. Different brands absorb liquid differently, so you may need to adjust the milk quantity accordingly.
Nut Butter Considerations
Cashew butter provides the creamiest, most cookie dough-like texture, but almond butter is a close second. For nut-free versions, sunflower seed butter works wonderfully and tastes surprisingly similar. Make sure whatever butter you choose is well-stirred and at room temperature for easier mixing.
Chocolate Melting Success
The coconut oil isn’t just for flavor—it helps create a smooth, shiny chocolate coating that sets with a professional-looking finish. Without it, the chocolate can be thicker and harder to work with. Vegetable oil or even a tiny bit of shortening can substitute in a pinch.
Vegan Adaptations
Making these completely plant-based is simple. Choose a plant-based protein powder (pea, hemp, or brown rice protein all work well), use non-dairy milk like almond or oat milk, and select dairy-free chocolate chips. Replace honey with maple syrup or agave nectar.
Storage Guidelines
Always store these protein balls in an airtight container in the refrigerator. They’ll maintain their best quality for up to one week, though they rarely last that long in my house. The chocolate coating can soften at room temperature, so keep them chilled until ready to serve.
Nutrition Information
- Serving Size: 1 ball
- Calories: 120
- Sugar: 5g
- Sodium: 40mg
- Fat: 7g
- Saturated Fat: 3g
- Unsaturated Fat: 4g
- Trans Fat: 0g
- Carbohydrates: 10g
- Fiber: 1g
- Protein: 5g
- Cholesterol: 2mg

Frequently Asked Questions
Can I use regular flour instead of almond flour?
While you technically can, I don’t recommend it. Regular all-purpose flour doesn’t have the same nutritional benefits and needs to be heat-treated to be safe for no-bake recipes. Almond flour provides healthy fats and protein, plus it creates a better cookie dough texture. If you can’t use almond flour, oat flour is your best alternative—just blend rolled oats in a food processor until they reach a flour consistency.
Why are my protein balls falling apart?
This usually means your mixture is too dry. Protein powders vary significantly in how much liquid they absorb, depending on the brand and type. Add milk one teaspoon at a time until the mixture holds together when squeezed. Another tip is to let the dough rest for 5 minutes after mixing—sometimes the liquid needs time to fully absorb into the dry ingredients.
Do I have to use the chocolate coating?
Not at all! The protein balls are delicious on their own without any coating. Skipping the chocolate makes them slightly less sweet and saves you some calories and prep time. However, the coating does help seal in freshness and makes them look more polished. Think of it as optional but highly recommended.
Can I make these without protein powder?
Yes, but you’ll need to adjust the recipe. Replace the protein powder with an equal amount of additional flour (almond or oat), and you might need to reduce the liquid slightly since flour absorbs less than protein powder. Keep in mind that without the protein powder, these become more of a treat than a protein-packed snack, with significantly less protein per ball.
What’s the best way to prevent chocolate from seizing?
The key is to avoid getting any water in your chocolate and to heat it gently. Even a single drop of water can cause chocolate to seize and become grainy. Make sure your bowl and utensils are completely dry, and don’t cover the chocolate while melting as condensation can drip in. The coconut oil also helps prevent seizing by adding a bit of fat to the mixture.
How do I know if I’ve added enough milk?
The perfect consistency should resemble edible cookie dough—slightly sticky but firm enough to roll into balls that hold their shape. If you can squeeze the dough in your palm and it sticks together without crumbling, you’re good. If it’s so sticky that it won’t release from your hands, you’ve added too much liquid—just mix in a tablespoon or two more of flour to balance it out.
Can kids help make these?
Absolutely! This is one of my favorite recipes to make with children. They can help measure ingredients, mix the dough, and especially love the rolling part. Just supervise the chocolate melting step or handle that yourself. It’s a great way to teach them about healthy treats and get them involved in the kitchen.
Why do they need to be refrigerated?
The nut butter and protein powder in these balls can spoil at room temperature, especially in warm weather. Refrigeration keeps them food-safe and also maintains their texture—they become too soft and sticky at room temperature. The chocolate coating can also melt if left out too long, creating a mess.