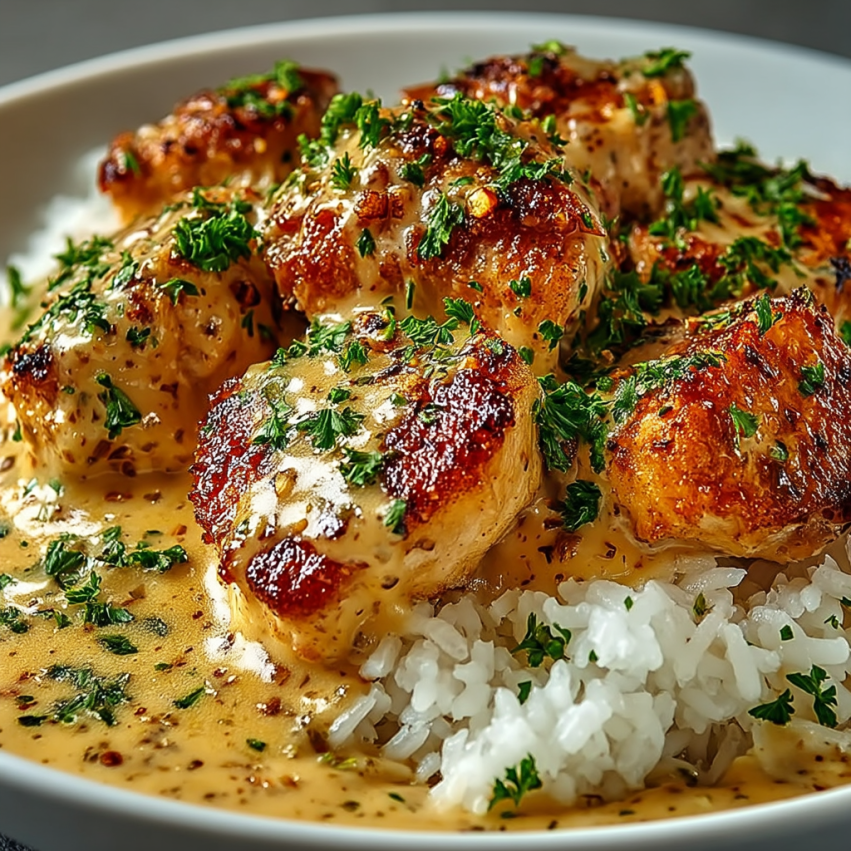
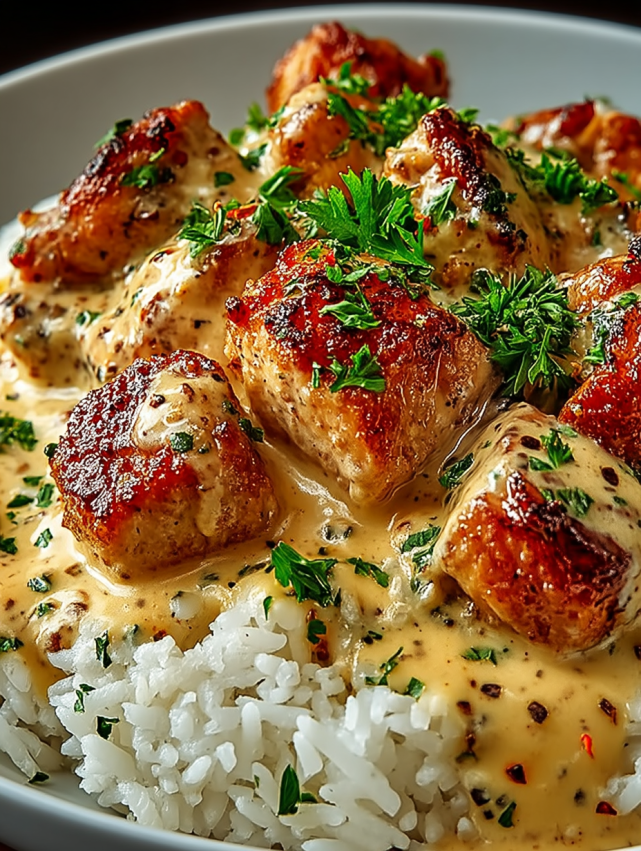
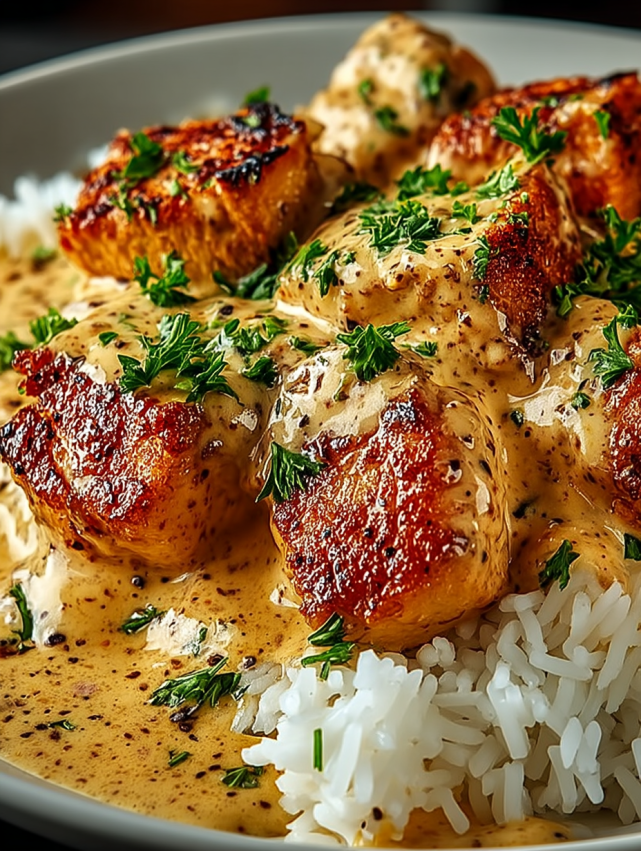
There’s something magical about a plate of tender chicken draped in velvety, cheese-infused sauce, nestled beside perfectly fluffy rice. This dish reminds me of Sunday dinners at my grandmother’s house, where comfort food was always the star of the show. However, instead of spending hours in the kitchen, this version comes together in under an hour, making it perfect for busy weeknights when you crave something truly satisfying.
The beauty of this recipe lies in its simplicity and the way each component complements the others. Moreover, it’s one of those meals that looks impressive enough for guests but is easy enough to make on a Tuesday evening.
Why You’ll Love This Creamy Chicken and Rice
It’s a complete one-pot wonder – Well, technically two pots, but everything comes together seamlessly without complicated techniques or hard-to-find ingredients. Additionally, the entire meal cooks simultaneously, saving you precious time.
The sauce is restaurant-quality – Rich, creamy, and perfectly seasoned with garlic, thyme, and two types of cheese. Furthermore, it’s made from scratch without any cream-of-whatever canned soups, giving you full control over the flavor and texture.
Perfect for meal prep – This dish reheats beautifully, making it ideal for preparing ahead. In fact, many people say it tastes even better the next day once the flavors have melded together.
Family-friendly and customizable – Even picky eaters love this comforting combination. Meanwhile, you can easily adjust the spices or add vegetables to suit your family’s preferences.
Budget-friendly ingredients – Using simple pantry staples and affordable chicken breasts, this recipe delivers maximum flavor without breaking the bank. Despite its elegant appearance, it costs just a fraction of what you’d pay at a restaurant.
Ingredients You’ll Need
For the Chicken
- 4 boneless, skinless chicken breast fillets
- 1 teaspoon granulated garlic
- 1 teaspoon granulated onion
- 1 teaspoon smoked sweet paprika
- Salt and black pepper to taste
- 2 tablespoons olive oil
For the Rice
- 200g long-grain rice
- 500ml chicken stock
- 1/2 teaspoon salt
For the Creamy Sauce
- 2 tablespoons unsalted butter
- 2 tablespoons all-purpose flour
- 375ml whole milk
- 125ml chicken stock
- 1/2 teaspoon granulated garlic
- 1/4 teaspoon dried thyme
Cheese and Garnish
- 50g shredded cheddar cheese
- 50g grated Parmesan cheese
- Fresh parsley for decoration
Step-by-Step Instructions
Preparing and Seasoning the Chicken
Start by thoroughly patting the chicken fillets dry with paper towels. This crucial step ensures you’ll get a beautiful golden crust when searing. Next, evenly sprinkle both sides of each fillet with granulated garlic, granulated onion, smoked paprika, salt, and pepper.
Gently massage the spices into the meat using your fingertips, allowing them to penetrate deep into the chicken’s structure. This technique is essential for achieving intense flavor throughout each piece rather than just on the surface. Let the seasoned chicken rest at room temperature for about 10 minutes while you prepare other ingredients.
Searing the Chicken to Golden Perfection
Heat the olive oil in a large skillet over medium-high heat until it shimmers. Once the oil is properly heated, carefully lay the chicken fillets in the pan, making sure not to overcrowd them. Sear for 5-7 minutes on each side until you achieve a gorgeous golden-brown crust.
Resist the temptation to flip the chicken too early – patience here ensures juicy interiors and crispy exteriors. When perfectly cooked, the internal temperature should reach 165°F (74°C). Transfer the cooked chicken to a plate and tent it loosely with aluminum foil to keep warm.
Cooking the Aromatic Rice
Meanwhile, in a separate saucepan, bring the chicken stock and salt to a rolling boil. As soon as the broth reaches a boil, stir in the rice and give it a good mix to prevent sticking. Immediately reduce the heat to the lowest setting and cover the pot with a tight-fitting lid.
Allow the rice to cook undisturbed for 15-20 minutes until it absorbs all the liquid and becomes fluffy. Avoid lifting the lid during cooking, as this releases essential steam. After the cooking time, remove from heat and let it rest for 5 minutes before fluffing gently with a fork.
Creating the Creamy Base Sauce
Using the same skillet where you cooked the chicken (don’t clean it – those browned bits are pure flavor!), melt the butter over medium heat. Once the butter foams, add the flour and whisk vigorously for 1-2 minutes to create a light roux. This foundation is crucial for achieving a smooth, lump-free sauce.
Gradually pour in the milk and chicken stock in a thin, steady stream while whisking constantly. This slow addition prevents lumps from forming. Continue stirring regularly as the mixture heats up and begins to thicken, which typically takes 3-4 minutes.
Finishing the Cheese Sauce
When the sauce reaches a creamy consistency that coats the back of a spoon, stir in the granulated garlic and dried thyme. These aromatics add wonderful depth without overpowering the dish. Then, gradually incorporate both the cheddar and Parmesan cheeses, stirring continuously until they melt completely and blend seamlessly into the sauce.
Taste the sauce and adjust the seasoning with additional salt and pepper if needed. If your sauce seems too thick, simply whisk in a splash of warm chicken stock until you reach the desired consistency. The final result should be luxuriously creamy but still pourable.
Bringing Everything Together
Return the seared chicken fillets to the skillet, nestling them into the sauce. Spoon the creamy mixture over each piece, ensuring they’re generously coated. Allow the chicken to warm through for 2-3 minutes, giving the flavors time to meld beautifully together.
During this final step, the chicken will absorb some of the sauce’s richness while releasing its own juices, creating an even more flavorful dish. Gently turn the fillets once or twice to ensure even coating.
Serving Suggestions
Classic Presentation
Spoon a generous portion of fluffy rice onto a warmed dinner plate, creating a bed for the chicken. Place one chicken fillet on top of the rice, then ladle the creamy sauce liberally over everything. Finally, garnish with a sprinkle of freshly chopped parsley for a pop of color and freshness.
Family-Style Service
Serve this comforting meal in deep bowls where the rice forms the base and the sauced chicken takes center stage. Additionally, place a basket of warm dinner rolls on the table for soaking up every last drop of that incredible sauce. This casual approach encourages everyone to dig in and enjoy.
Elegant Plated Version
For a more sophisticated presentation, slice the chicken breast diagonally into medallions and fan them artfully over the rice. Drizzle the sauce around the plate’s edge rather than over the top, then garnish with a sprig of fresh thyme or a light dusting of paprika. This restaurant-style plating elevates the dish for special occasions.
With Additional Vegetables
Balance the richness of this creamy dish by serving it alongside a crisp arugula salad dressed with lemon vinaigrette. Alternatively, steam some bright green broccoli florets or tender green beans to add color and nutrition. These lighter sides complement the hearty main course without competing with its flavors.
Recipe Variations
Chicken Thigh Version
Swap the chicken breasts for boneless, skinless thighs if you prefer darker meat with more intense flavor. Thighs require slightly longer cooking time – approximately 8-10 minutes per side – but the result will be even juicier and more succulent. Furthermore, thighs are more forgiving and less likely to dry out.
Spicy Rendition
Add a pinch of cayenne pepper to the chicken seasoning blend for a subtle kick of heat. Alternatively, stir a teaspoon of Dijon mustard into the finished sauce for tangy complexity. For those who love serious heat, garnish the completed dish with thinly sliced fresh chili peppers.
Vegetable-Enhanced Version
During the last 5 minutes of rice cooking, stir in frozen peas or roughly chopped spinach leaves. These vegetables will cook perfectly in the residual heat while adding vibrant color and nutritional value. Moreover, you can sauté mushrooms, bell peppers, or zucchini separately and fold them into the sauce.
Mushroom Lover’s Dream
Before preparing the sauce, sauté sliced button mushrooms, cremini, or shiitake in the skillet until golden brown. Set them aside, then incorporate them back into the finished sauce just before serving. The earthy mushroom flavor adds wonderful depth and makes the dish feel even more luxurious and hearty.
Make-Ahead Tips
Advance Preparation Options
You can season the chicken up to 24 hours ahead and store it covered in the refrigerator. This actually enhances the flavor as the spices have more time to penetrate. Similarly, you can shred the cheeses and measure out all ingredients the night before, making dinner assembly incredibly quick.
Storage Guidelines
Store leftover chicken and sauce in an airtight container in the refrigerator for up to 3 days. Keep the rice in a separate container to prevent it from becoming mushy. When stored properly, both components maintain their quality and flavor beautifully.
Reheating Instructions
Reheat the chicken and sauce gently in a skillet over medium-low heat, adding a splash of milk or chicken stock to restore the creamy consistency. For the rice, sprinkle it with a tablespoon of water and microwave in 30-second intervals, fluffing between each. Alternatively, reheat everything together in a 350°F (175°C) oven for 15-20 minutes.
Freezing Considerations
While this dish can be frozen, the sauce may separate slightly upon thawing due to the dairy content. If you plan to freeze it, cool everything completely first, then store in freezer-safe containers for up to 2 months. Thaw overnight in the refrigerator before reheating, whisking the sauce vigorously to re-emulsify it.
Important Notes
About the chicken thickness – If your chicken breasts are particularly thick (over 1 inch), consider butterflying them or pounding them to an even thickness. This ensures they cook through completely without drying out the thinner parts.
Sauce consistency tips – The sauce will thicken as it cools, so don’t worry if it seems slightly thin while hot. However, if you prefer a thicker sauce from the start, simply cook it a minute or two longer before adding the cheese.
Rice substitutions – While long-grain white rice works beautifully, you can substitute with jasmine rice, basmati, or even brown rice (adjust cooking time and liquid accordingly). Each variety brings its own subtle flavor and texture to the dish.
Dairy alternatives – For a lighter version, you can replace the whole milk with 2% milk, though the sauce won’t be quite as rich. Unfortunately, non-dairy alternatives don’t work well in this recipe as they don’t create the same creamy consistency.
Scaling the recipe – This recipe easily doubles or halves depending on your needs. When doubling, you may need to cook the chicken in batches to avoid overcrowding the pan, which would cause steaming rather than searing.
Frequently Asked Questions
Can I use chicken tenderloins instead of breasts?
Absolutely! Chicken tenderloins work wonderfully in this recipe and cook even faster than breasts. Reduce the searing time to about 3-4 minutes per side since tenderloins are naturally thinner. They’ll be just as juicy and delicious while cutting down your cooking time significantly.
Why is my sauce lumpy?
Lumps typically form when the flour isn’t properly incorporated into the butter or when the liquid is added too quickly. To fix lumpy sauce, simply push it through a fine-mesh strainer or blend it briefly with an immersion blender. In the future, make sure to whisk constantly when adding liquids and add them gradually in a thin stream.
Can I make this dish without wine?
Yes, this recipe doesn’t call for wine at all! The combination of chicken stock, milk, and seasonings creates plenty of flavor depth. However, if you’d like to add extra complexity, you could deglaze the pan with a splash of white wine before making the sauce.
How do I know when the chicken is done?
The most reliable method is using an instant-read thermometer inserted into the thickest part of the breast – it should read 165°F (74°C). Visually, the juices should run clear, not pink, when pierced. Additionally, the meat should feel firm but still slightly springy when pressed gently.
What if I don’t have granulated garlic or onion?
You can substitute with garlic powder and onion powder in equal amounts, or use fresh alternatives. For fresh garlic, use 2-3 cloves minced and sauté them in the oil before adding the chicken. For fresh onion, finely dice about half a small onion and sauté it until soft and translucent.
Can I use pre-cooked rotisserie chicken?
While this recipe is designed for raw chicken to build flavors through searing, you can adapt it for rotisserie chicken. Simply shred or slice the pre-cooked chicken and add it to the finished sauce to warm through. You’ll miss the caramelized crust from searing, but it’s a great time-saving option.
Is there a way to make this healthier?
Several modifications can lighten this dish without sacrificing too much flavor. Use skinless chicken breast (as called for), substitute low-fat milk for whole milk, reduce the cheese by half, and serve over cauliflower rice instead of regular rice. These swaps significantly reduce calories and carbs while keeping the dish satisfying.