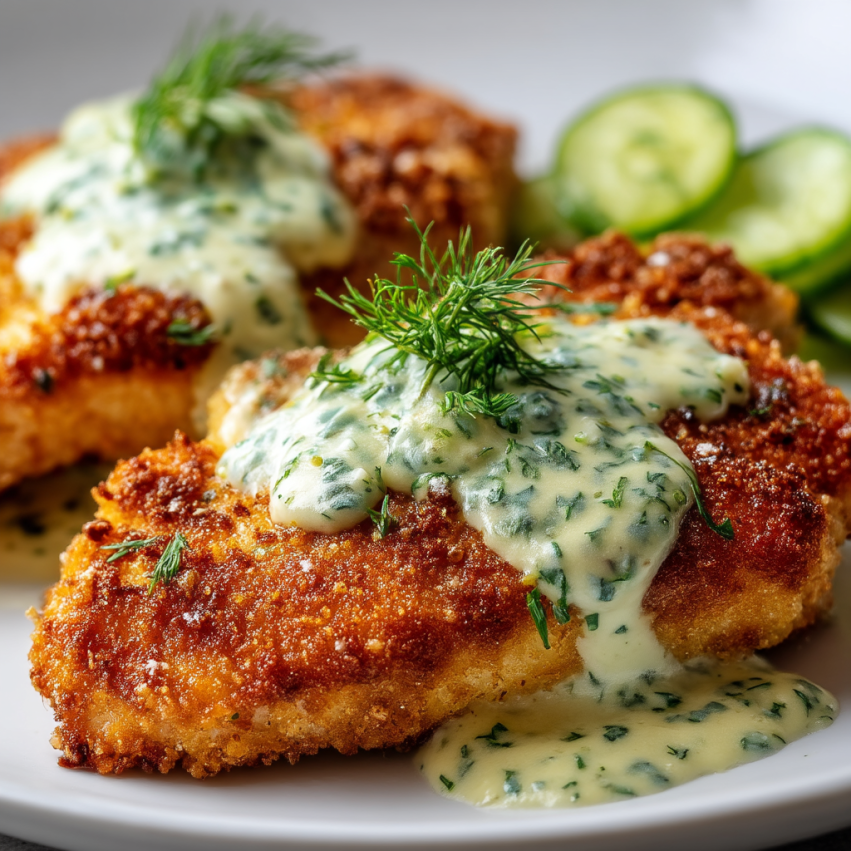
There’s something magical about the combination of tangy pickles and savory Parmesan cheese. I first discovered this incredible pairing at a local diner, where the chef casually mentioned marinating chicken in pickle juice. Skeptical at first, I took one bite and was instantly hooked. The pickle juice acts as a natural tenderizer while infusing the chicken with a subtle tang that perfectly complements the crispy, cheesy coating. Since that day, this recipe has become my go-to whenever I want to impress dinner guests or simply treat my family to something extraordinary.
What makes this dish truly special is how it transforms simple chicken breasts into something restaurant-worthy. The dill pickle juice works its magic during marination, breaking down the proteins and ensuring every bite is juicy and flavorful. Meanwhile, the Parmesan-breadcrumb coating creates an irresistibly crunchy exterior that stays crispy long after cooking.
Why You’ll Love This Recipe
It’s incredibly flavorful without being complicated. Unlike other chicken recipes that require dozens of ingredients, this one relies on pantry staples and the unexpected hero: pickle juice. The tangy marinade penetrates deep into the meat, creating layers of flavor that complement rather than overpower.
The texture is absolutely perfect. Golden-brown and crunchy on the outside, tender and juicy on the inside—this chicken delivers the satisfying contrast that makes fried chicken so beloved. Additionally, the Parmesan cheese in the coating adds a nutty richness that elevates the entire dish beyond typical breaded chicken.
You can prepare it ahead of time. Busy weeknights become stress-free when you can marinate the chicken the night before. In fact, longer marination times (up to 24 hours) result in even more tender, flavorful meat. This flexibility makes it ideal for meal planning and entertaining.
Ingredients You’ll Need
Main Components
- 4 chicken breasts, boneless and skinless – Choose evenly-sized pieces for consistent cooking
- 1 cup dill pickle juice – The secret ingredient that tenderizes and flavors
- 1 cup breadcrumbs (preferably seasoned) – Panko works wonderfully for extra crunch
- ½ cup grated Parmesan cheese – Freshly grated melts better and tastes superior
- 2 large eggs – Acts as the binding agent for the coating
- ½ cup all-purpose flour – Creates the foundation layer for breading
- 1 teaspoon garlic powder – Adds aromatic depth
- 1 teaspoon onion powder – Enhances savory notes
- ½ teaspoon paprika – Provides subtle color and mild sweetness
- Salt and pepper to taste – Essential for seasoning
- Cooking oil (for frying) – Vegetable or canola oil works best
Optional Serving Suggestions
Consider pairing this chicken with creamy coleslaw, garlic mashed potatoes, or a fresh garden salad. A side of ranch or honey mustard dressing makes an excellent dipping sauce that complements the tangy, cheesy flavors.
Step-by-Step Instructions
Creating Crispy Dill Pickle Parmesan Chicken is simpler than you might think. Just follow these easy steps for guaranteed success every time.
Marinating the Chicken
Begin by placing your chicken breasts in a large bowl or resealable plastic bag. Pour the dill pickle juice over them, ensuring each piece is completely submerged. This step is crucial—the acidic juice tenderizes the meat while infusing it with that distinctive pickle flavor. Refrigerate for at least 30 minutes, though overnight marination yields even better results.
Setting Up Your Breading Station
While the chicken marinates, prepare your three-bowl breading station. This assembly-line approach makes coating the chicken efficient and mess-free. In the first shallow bowl, combine flour with salt, pepper, and garlic powder. Whisk the eggs in the second bowl until well blended. Finally, mix breadcrumbs and grated Parmesan cheese in the third bowl, ensuring even distribution.
Preparing to Fry
Heat your oil in a large, heavy-bottomed skillet over medium heat. You’ll need enough oil to reach about ¼ inch up the sides of the pan. To test if it’s ready, drop a pinch of breadcrumbs into the oil—they should sizzle immediately without burning. Proper oil temperature is essential for achieving that perfect golden crust.
Coating Process
Remove each chicken breast from the marinade, allowing excess pickle juice to drip off. First, dredge the chicken in the seasoned flour, coating all sides and shaking off any excess. Next, dip it into the beaten eggs, letting any extra drip back into the bowl. Finally, press the chicken firmly into the breadcrumb-Parmesan mixture, ensuring complete coverage. Pat the coating gently to help it adhere.
Frying to Perfection
Carefully place the breaded chicken into the hot oil, being cautious to avoid splashing. Fry for 5-7 minutes per side, resisting the urge to move the chicken too frequently—this allows the crust to form properly. You’ll know it’s ready to flip when the edges turn golden brown. Cook until the internal temperature reaches 165°F (75°C) and the coating is uniformly crispy.
Finishing Touches
Transfer the cooked chicken to a plate lined with paper towels, which absorbs excess oil while keeping the coating crispy. Allow the chicken to rest for 5-10 minutes before serving. During this time, the juices redistribute throughout the meat, ensuring maximum tenderness. Serve immediately while hot, or let it cool completely before storing.
Serving Suggestions That Shine
This versatile chicken pairs beautifully with countless side dishes. For a Southern-inspired meal, serve it alongside buttery corn on the cob and mac and cheese. Alternatively, create a lighter option by placing sliced chicken over mixed greens with cherry tomatoes and a tangy vinaigrette.
Transform leftovers into amazing sandwiches by tucking sliced chicken into toasted brioche buns with lettuce, tomato, and extra pickles. The combination creates a gourmet chicken sandwich that rivals any restaurant version. You can also dice the chicken and toss it with pasta, Caesar dressing, and Parmesan for a quick weeknight dinner.
Recipe Variations to Try
Spicy Pickle Chicken
Add ½ teaspoon of cayenne pepper to your flour mixture and use spicy pickle juice instead of regular. This variation delivers a pleasant heat that doesn’t overwhelm the other flavors.
Air Fryer Version
For a lighter option, spray the breaded chicken with cooking oil and air fry at 400°F for 12-15 minutes, flipping halfway through. While the texture differs slightly from pan-frying, you’ll still achieve impressive crispiness with significantly less oil.
Herb-Infused Coating
Mix fresh or dried herbs like thyme, oregano, and parsley into your breadcrumb mixture. These additions create an Italian-inspired flavor profile that pairs wonderfully with marinara sauce.
Baked Alternative
If you prefer avoiding frying altogether, bake the breaded chicken at 425°F for 20-25 minutes on a wire rack set over a baking sheet. Spray the tops with cooking oil before baking to help achieve golden color.
Make-Ahead Tips for Busy Cooks
Planning ahead makes this recipe even more convenient. Marinate the chicken up to 24 hours in advance—longer marination times only improve the flavor and texture. You can also bread the chicken up to 4 hours ahead and refrigerate it on a parchment-lined baking sheet until ready to cook.
Fully cooked chicken stores well in the refrigerator for up to 3 days. Keep it in an airtight container and reheat in a 350°F oven for 10-12 minutes to restore crispiness. Avoid microwaving, as this makes the coating soggy.
For longer storage, freeze the cooked and cooled chicken in freezer-safe containers for up to 2 months. Thaw overnight in the refrigerator before reheating. Interestingly, you can also freeze the breaded but uncooked chicken, then fry it straight from frozen—just add a few extra minutes to the cooking time.
Important Notes
Don’t skip the resting time after frying. Those few minutes allow the chicken to retain its juices, preventing dry meat. Additionally, the coating continues to crisp up slightly during this period.
Monitor your oil temperature throughout cooking. If it’s too hot, the coating burns before the chicken cooks through. Conversely, oil that’s too cool results in greasy, soggy breading. Maintain medium heat and adjust as needed.
Use a meat thermometer to ensure food safety. Chicken must reach an internal temperature of 165°F (75°C). This simple tool removes all guesswork and guarantees perfectly cooked meat every time.
Pound thick chicken breasts to an even thickness before marinating. This ensures uniform cooking and prevents thin ends from overcooking while thick portions remain underdone. Place the chicken between plastic wrap and gently pound with a meat mallet.
Frequently Asked Questions
Can I use chicken thighs instead of breasts?
Absolutely! Boneless, skinless chicken thighs work wonderfully in this recipe. They’re naturally more forgiving due to their higher fat content, which means they stay juicy even if slightly overcooked. However, you may need to adjust the cooking time slightly—thighs typically require an extra minute or two per side.
What if I don’t have pickle juice?
While pickle juice is the star ingredient, you can substitute it with a mixture of equal parts water, white vinegar, and a teaspoon of dill. This won’t replicate the exact flavor, but it provides similar tenderizing properties and tangy notes.
How do I keep the coating from falling off?
Proper preparation is key. Make sure each chicken piece is thoroughly dried after marinating—excess moisture prevents the flour from adhering. Press the breadcrumb coating firmly onto the chicken and let it rest for 5 minutes before frying. This allows the coating to set. Also, avoid moving the chicken too much while frying, as this can dislodge the breading.
Can this recipe be made gluten-free?
Yes! Simply substitute gluten-free flour and breadcrumbs for their regular counterparts. The texture and flavor remain excellent with these simple swaps.
Why is my chicken dry even though I followed the recipe?
Overcooking is the most common culprit. Even a few extra minutes can dry out chicken breasts. Always use a meat thermometer and remove the chicken from heat as soon as it reaches 165°F. Remember that carryover cooking will raise the temperature slightly during resting.
What’s the best way to reheat leftovers?
The oven is your best friend for reheating. Place the chicken on a wire rack over a baking sheet and heat at 350°F for 10-12 minutes. This method helps the coating stay crispy while warming the meat evenly. An air fryer also works beautifully—reheat at 350°F for 5-7 minutes.
Prep Time: 15 minutes
Cook Time: 30-40 minutes
Total Time: 45-55 minutes
Nutrition (per serving)
- Serving Size: 4
- Calories: 350 kcal
- Fat: 15g
- Protein: 32g
- Carbohydrates: 22g
- Fiber: 1g