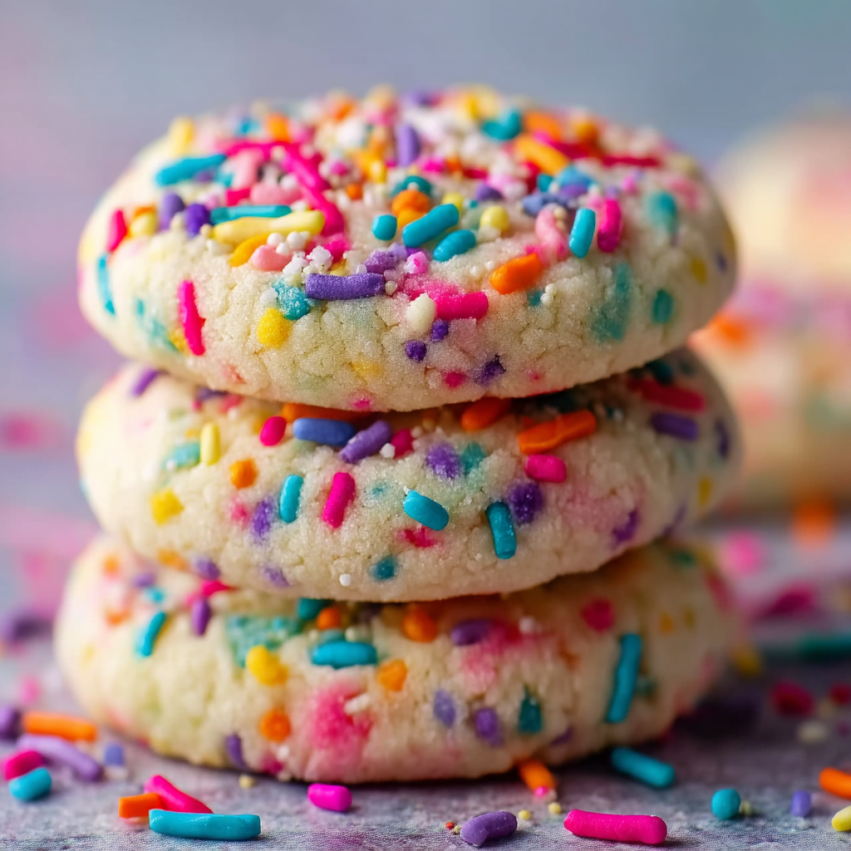
There’s something magical about pulling a tray of colorful sprinkle cookies from the oven – the sweet aroma, the cheerful pops of color, and that promise of soft, pillowy perfection. I still remember making these with my niece last summer, watching her eyes light up as she rolled each dough ball into extra sprinkles. These cookies have since become my go-to whenever I need something that tastes homemade but doesn’t require rolling pins or cookie cutters. They’re simple, forgiving, and absolutely delicious.
Why You’ll Love This Recipe
Effortlessly Simple: Unlike traditional sugar cookies that require rolling and cutting, these drop-style beauties come together in one bowl with minimal fuss. There’s no need for special equipment or advanced baking skills – just mix, scoop, and bake.
Perfectly Textured Every Time: The combination of baking powder and chilled dough creates cookies that are crispy on the edges while remaining wonderfully soft and chewy in the center. Furthermore, the overnight chill option means you can prepare the dough ahead and bake fresh cookies whenever a craving strikes.
Endlessly Customizable: Whether you’re celebrating a birthday, holiday, or just Tuesday, these cookies adapt to any occasion. Simply swap the sprinkle colors to match your theme, and you’ve got an instant party on a plate.
Crowd-Pleasing Appeal: Kids and adults alike can’t resist these colorful treats. In fact, they’re one of the few desserts that consistently disappear within hours at any gathering I bring them to.
Essential Ingredients
Main Components
- 1½ cups (188g) all-purpose flour (spooned & leveled)
- 1½ teaspoons baking powder
- ¼ teaspoon salt
- ½ cup (8 Tbsp; 113g) unsalted butter, softened to room temperature
- ¾ cup (150g) granulated sugar
- 1 large egg, at room temperature
- 1 teaspoon pure vanilla extract
- ½ cup (80g) sprinkles, plus extra for topping
Quality Matters
Using room temperature ingredients is crucial for proper mixing and achieving that coveted soft texture. The butter should be soft enough to leave an indent when pressed but not melting or greasy. Additionally, measuring flour correctly by spooning and leveling ensures the perfect texture – too much flour will result in dry, crumbly cookies that lack that signature chewiness. Meanwhile, choosing high-quality sprinkles (jimmies work better than nonpareils) prevents color bleeding and maintains their shape during baking.
Step-by-Step Instructions
Preparing the Base
Begin by whisking together the flour, baking powder, and salt in a medium bowl. This dry mixture should be set aside while you work on the wet ingredients. Whisking ensures even distribution of the leavening agent, which is essential for uniform rise and texture.
Creating the Cookie Dough
In a large bowl, use either a hand mixer or stand mixer with paddle attachment to beat the softened butter and granulated sugar together. Mix on medium-high speed for about one minute until the mixture becomes light and creamy with a pale yellow color. Next, add the egg and vanilla extract, beating on high speed for another minute until everything is well combined and slightly fluffy.
Bringing It All Together
Add the dry ingredients to the wet mixture, mixing on low speed until just combined. Avoid overmixing at this stage, as it can lead to tough cookies with a dense, cake-like texture. Once combined, gently beat in the ½ cup of sprinkles until evenly distributed throughout the dough. The dough should look thick, colorful, and slightly sticky.
Shaping and Chilling
The dough will be thick and slightly sticky – this is exactly what you want! Scoop approximately 2 tablespoons (40g) of dough for each cookie and roll into balls between your palms. For an extra pop of color, lightly dip the tops of each dough ball in additional sprinkles, pressing gently so they adhere. Place the shaped cookies on a large plate or lined baking sheet, leaving some space between them.
The Crucial Chill Time
Cover the dough balls and refrigerate for at least 2 hours. This step is absolutely essential for preventing over-spreading during baking and helps develop deeper flavor. The cold dough also holds its shape better, resulting in thicker cookies with better texture. Moreover, the cookies can be chilled for up to 4 days, making them perfect for meal prep or whenever you want fresh-baked cookies on demand.
Baking to Perfection
Preheat your oven to 350°F (177°C) and line baking sheets with parchment paper or silicone mats. Arrange the chilled dough balls 3 inches apart on the prepared sheets – they will spread considerably during baking. Bake for 12-13 minutes until the edges are lightly golden with a slight firmness. The centers should still look very soft and almost underbaked when you remove them from the oven.
Final Steps
Allow cookies to cool on the baking sheet for 5 minutes before transferring to a wire rack. This resting time helps them set properly without breaking apart, and the residual heat continues cooking them to perfection. Resist the urge to move them too soon, as they’ll be quite delicate straight from the oven.
Serving Suggestions
Perfect Pairings
These sprinkle sugar cookies pair beautifully with a cold glass of milk or a warm cup of coffee for a classic afternoon snack. They’re also delightful alongside vanilla ice cream for an extra-special dessert, or crumbled over yogurt for a fun breakfast treat. For special occasions, serve them with hot chocolate topped with whipped cream and – you guessed it – more sprinkles!
Presentation Ideas
For parties or gifts, arrange these colorful cookies on a decorative platter or package them in clear cellophane bags tied with ribbons. The vibrant sprinkles make them naturally festive and eye-catching without any additional decoration needed. Alternatively, stack them in mason jars with layers of parchment paper for a charming homemade gift that friends and family will treasure.
Creative Variations
Seasonal Adaptations
Transform these cookies for any occasion by changing the sprinkle colors. Use red and green for Christmas, pastels for Easter, or orange and black for Halloween to instantly match the mood. You can also add a teaspoon of almond extract in place of vanilla for a different flavor profile that’s especially lovely for wedding showers or baby celebrations.
Flavor Twists
Consider mixing in mini chocolate chips instead of sprinkles for a more classic chocolate chip cookie experience. Try adding a tablespoon of cocoa powder to the dry ingredients for chocolate sugar cookies with a rich, deep flavor. Lemon zest can also add a bright, citrusy note that’s perfect for spring and summer gatherings. For a grown-up twist, a quarter teaspoon of espresso powder intensifies the overall flavor without making them taste like coffee.
Size Variations
Make mini cookies using 1 tablespoon of dough each for bite-sized treats perfect for cookie platters or kids’ parties. Go jumbo with ¼ cup portions for bakery-style cookies that feel indulgent and special. Just adjust the baking time accordingly – smaller cookies need 8-10 minutes, while larger ones may need 14-16 minutes. However, always watch for those lightly golden edges as your doneness indicator.
Make-Ahead Tips
Dough Storage: The shaped cookie dough balls can be refrigerated for up to 4 days or frozen for up to 3 months. If freezing, arrange them on a baking sheet until solid, then transfer to a freezer bag. Bake directly from frozen, adding 1-2 extra minutes to the baking time.
Baked Cookie Storage: Once completely cooled, store cookies in an airtight container at room temperature for up to 1 week. Layer them with parchment paper to prevent sticking. For longer storage, freeze baked cookies for up to 2 months.
Advance Preparation: You can prepare the dough on Sunday evening and bake fresh cookies throughout the week. This strategy means warm cookies whenever you want them without the full time commitment each time.
Notas
- Don’t Skip the Chill: Refrigerating the dough isn’t optional – it’s what prevents flat, crispy cookies and ensures that soft, thick texture everyone loves.
- Room Temperature Ingredients: Cold butter won’t cream properly, and cold eggs can cause the butter to seize. Plan ahead by setting ingredients out 30-60 minutes before baking.
- Avoid Overbaking: These cookies continue cooking on the hot pan after removing from the oven. Taking them out when centers still look soft results in perfect texture once cooled.
- Sprinkle Selection: Jimmy sprinkles (the long, cylindrical ones) hold their shape and color better than nonpareils (tiny round balls) during baking. However, use whatever sprinkles make you happy!
- Measuring Matters: Scooping flour directly from the bag packs it down, resulting in too much flour. Instead, fluff the flour, spoon it into your measuring cup, and level with a knife.

Frequently Asked Questions
Why are my cookies spreading too much?
This usually happens when the dough isn’t chilled long enough or the butter was too soft. Make sure to refrigerate the shaped dough balls for at least 2 hours, and verify your butter is softened but not melted. Additionally, check that your oven is properly preheated before baking.
Can I use salted butter instead?
Yes, you can use salted butter if that’s what you have on hand. However, omit the ¼ teaspoon of salt from the recipe to prevent the cookies from tasting too salty.
My sprinkles are bleeding color into the dough. What am I doing wrong?
Some sprinkles are more prone to bleeding than others. Try using jimmies instead of nonpareils, and avoid overmixing once you add them. Natural or high-quality sprinkles also tend to hold their color better during baking.
Can I make these without a mixer?
Absolutely! You can cream the butter and sugar together with a wooden spoon or sturdy spatula – it just takes a bit more elbow grease. Make sure your butter is properly softened to make this easier.
How do I know when they’re done?
Look for lightly golden edges while the centers still appear very soft and slightly underbaked. They’ll firm up as they cool on the baking sheet. If you wait until the centers look completely done, they’ll be overbaked once cooled.
Can I use this recipe to make cut-out cookies?
While this dough is designed for drop cookies, you can chill it longer (overnight) and roll it out for cut-outs. However, you may need to add 2-4 tablespoons more flour to achieve the right consistency for rolling.
Why do I need to use room temperature ingredients?
Room temperature butter and eggs emulsify better, creating a smooth, cohesive dough that bakes evenly. Cold ingredients can result in a lumpy mixture that doesn’t incorporate properly, affecting the final texture of your cookies.