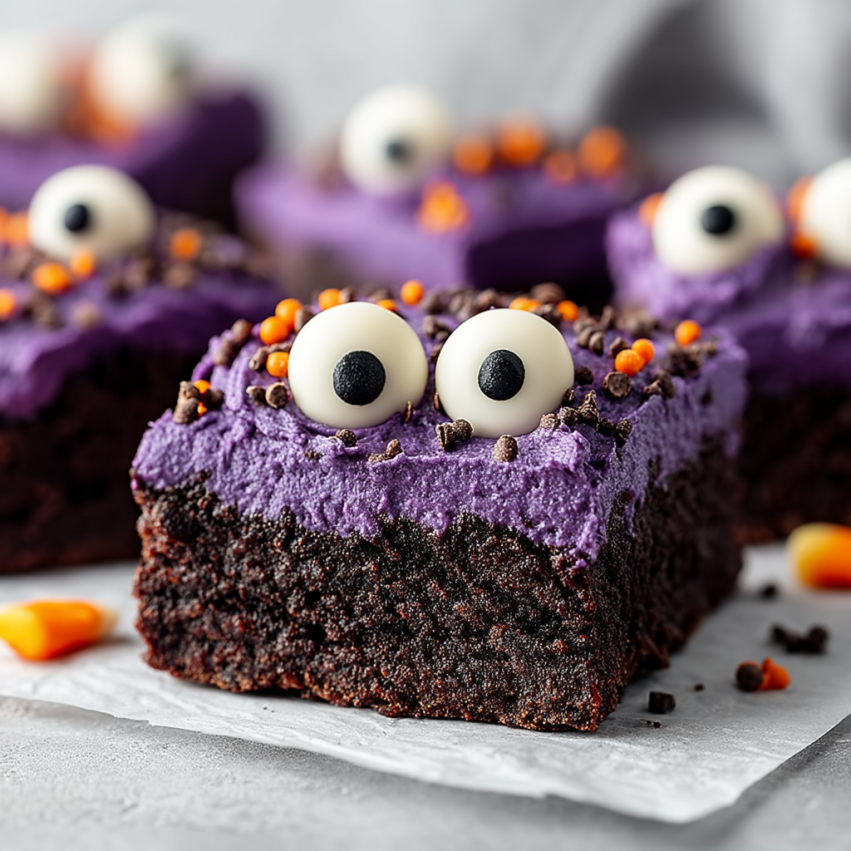
There’s something magical about watching kids’ faces light up when they see these colorful, googly-eyed treats on the dessert table. Last Halloween, I made these Monster Mash Brownies for my nephew’s school party, and they disappeared faster than any fancy decorated cookies I’d spent hours on. Sometimes, the simplest recipes become the most memorable ones, especially when they’re covered in candy eyes that seem to follow you around the room!
These brownies strike the perfect balance between homemade and hassle-free. They’re impressive enough to wow party guests but easy enough to make with kids helping in the kitchen. Plus, there’s something wonderfully therapeutic about smooshing candy eyes into frosting without worrying about perfection—after all, monsters aren’t supposed to look perfect!
Why You’ll Love This Recipe
Quick and Easy – Using a boxed brownie mix means you can whip these up in under an hour, including baking time. No complicated techniques or fancy equipment required.
Kid-Friendly Fun – Children absolutely love decorating these brownies. The candy eyes and sprinkles turn baking into an interactive craft project that they’ll talk about for weeks.
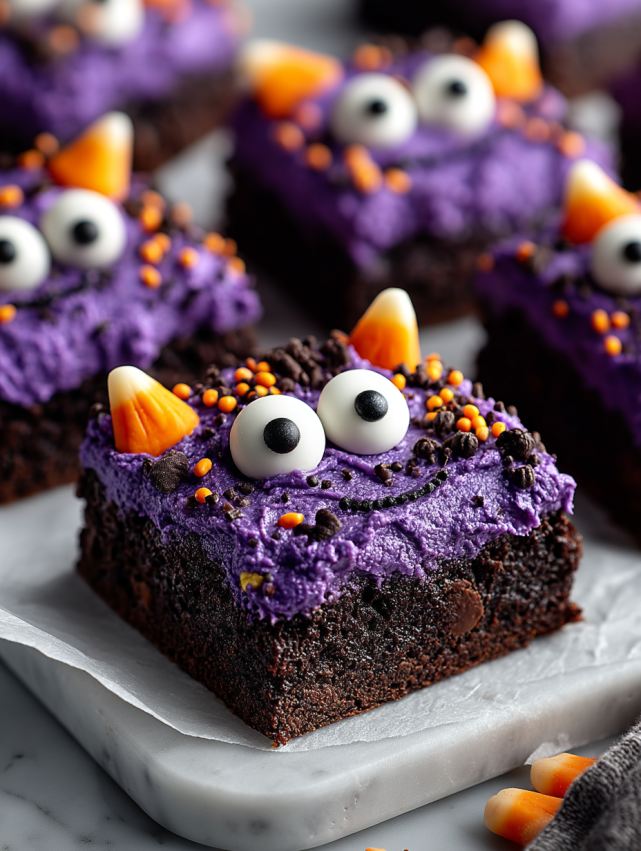
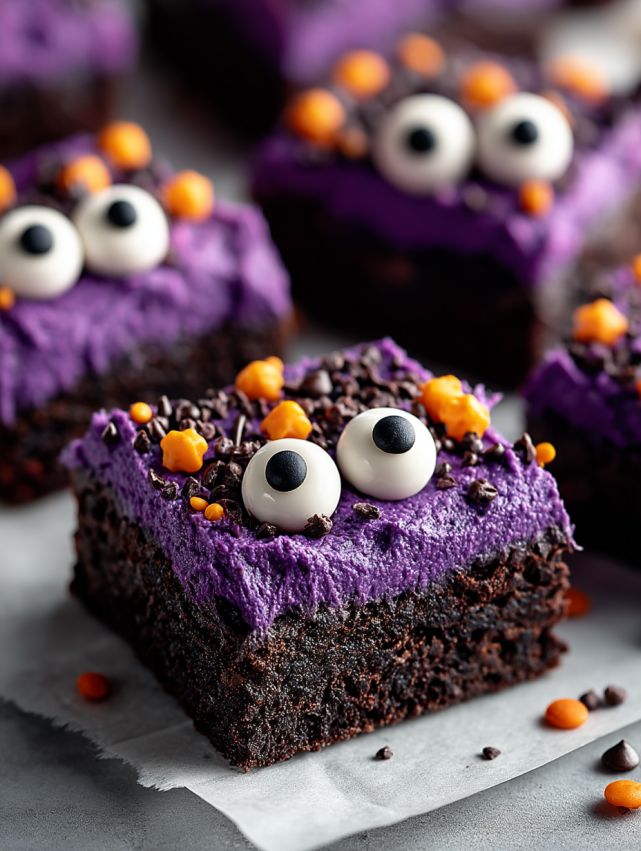
Customizable Colors – Whether you want classic green monsters, purple creatures, or bright orange goblins, you can match any Halloween theme. Mix and match different frosting colors on the same batch for extra visual impact.
Crowd-Pleaser – These brownies appeal to both kids and adults. While the decoration is whimsical and playful, underneath all that fun frosting is a rich, fudgy brownie that everyone enjoys.
Budget-Friendly – Most ingredients are pantry staples or inexpensive Halloween items you can find at any grocery store. You don’t need specialty ingredients or expensive decorations to make these look fantastic.
Ingredients You’ll Need
For the Brownies:
- 1 box brownie mix – Choose your favorite brand; fudgy varieties work especially well
- Ingredients listed on the box – Typically eggs, oil, and water (check your specific box)
For the Decoration:
- 1 cup vanilla frosting – Store-bought works perfectly, or use homemade if you prefer
- Food coloring – Green, purple, or orange gel colors give the most vibrant results
- Halloween sprinkles – Look for mixes with bats, pumpkins, or festive shapes
- Candy eyes – Various sizes create a more playful monster effect
Optional Add-ins:
- Mini chocolate chips for extra texture
- Chopped candy bars mixed into the batter
- Orange or black sanding sugar for extra sparkle
How to Make Monster Mash Brownies
Step 1: Prepare Your Pan
Preheat your oven according to the brownie box instructions, usually around 350°F. Grease a 9×13-inch baking pan with butter or cooking spray, making sure to get into all the corners. For easier cleanup, you can also line the pan with parchment paper, leaving some overhang on the sides to lift the brownies out later.
Step 2: Mix the Brownie Batter
Follow the package directions exactly as written on your brownie box. Most mixes call for eggs, vegetable oil, and water. Stir the ingredients together until just combined—you want a smooth batter, but don’t overmix. Overmixing can make brownies tough instead of fudgy.
Step 3: Bake to Perfection
Pour the batter into your prepared pan, spreading it evenly with a spatula. Bake according to the package directions, typically 25-30 minutes for a 9×13 pan. The brownies are done when a toothpick inserted near the center comes out with just a few moist crumbs. Remember, they’ll continue cooking slightly as they cool, so it’s better to slightly underbake than overbake.
Step 4: Cool Completely
This step is crucial—warm brownies will melt your frosting into a goopy mess! Let the brownies cool in the pan for at least an hour at room temperature. If you’re in a hurry, you can pop them in the refrigerator for 30 minutes to speed things up.
Step 5: Color Your Frosting
Scoop your vanilla frosting into a bowl. Add food coloring one drop at a time, stirring well between additions. Gel food colors work better than liquid ones because they give more vibrant colors without thinning the frosting. Keep adding color until you reach your desired shade—don’t be shy with it!
Step 6: Frost and Decorate
Spread the colored frosting evenly over the cooled brownies using an offset spatula or butter knife. Work quickly before the frosting sets. Immediately scatter Halloween sprinkles all over the frosted surface, then press candy eyes randomly across the brownies. The random placement makes them look more whimsical and monster-like. Feel free to cluster some eyes together or use different sizes for variety.
Step 7: Set and Slice
Let the decorated brownies sit for about 15-20 minutes so the frosting firms up slightly. This makes slicing much cleaner. Using a sharp knife, cut the brownies into 12 squares, wiping the knife clean between cuts for the neatest edges.
Serving Suggestions
These Monster Mash Brownies are show-stoppers all on their own, but you can take them up a notch with creative presentation. Arrange them on a black or orange platter for maximum Halloween impact. Stack them in different heights using cake stands or boxes covered in festive paper to create dimension on your dessert table.
Serve them alongside other Halloween treats like witch finger cookies or candy corn bark for a complete spooky spread. For drinks, pair them with orange punch, apple cider, or hot chocolate with marshmallow ghosts floating on top.
If you’re hosting a kids’ party, set up a DIY monster brownie station where children can frost and decorate their own squares. Provide small bowls of different colored frostings, various sprinkles, candy eyes in multiple sizes, and other fun toppings like gummy worms or candy corn.
For adult Halloween gatherings, serve these brownies with coffee or dessert cocktails. They’re playful enough to be conversation starters but delicious enough that grown-ups will genuinely enjoy eating them.
Recipe Variations
Chocolate Monster Brownies
Use chocolate frosting instead of vanilla for a double-chocolate experience. Tint it with a tiny bit of red food coloring for a “bloody” effect, or keep it dark and add green or purple sprinkles for contrast.
Candy-Loaded Monsters
Stir chopped Halloween candy like Reese’s cups, Snickers, or M&Ms into the brownie batter before baking. This adds surprise pockets of candy throughout each bite and makes them even more indulgent.
Cream Cheese Frosting Version
Replace vanilla frosting with cream cheese frosting for a tangy twist that balances the sweet brownie. Tint it orange and add fall-themed sprinkles for an autumn monster vibe.
Gluten-Free Monster Brownies
Simply use a gluten-free brownie mix instead of regular. Most gluten-free baking mixes work beautifully, and your guests likely won’t notice any difference once they’re frosted and decorated.
Homemade Brownie Base
If you prefer making brownies from scratch, use your favorite recipe instead of a box mix. Just make sure to bake them in a 9×13-inch pan so the proportions work correctly with the frosting amount.
Rainbow Monster Mash
Divide your frosting into three or four bowls and color each a different shade. Spread them in sections across the brownies or swirl them together for a tie-dye monster effect. This looks especially impressive and lets guests choose their favorite color.
Make-Ahead Tips
These brownies are perfect for busy party planners because you can prepare them well in advance. Bake the brownies up to two days ahead and store them tightly wrapped at room temperature. Wait to frost and decorate them until the day of your event to keep the colors vibrant and the decorations from sinking or smudging.
Alternatively, you can frost the brownies a day ahead and store them in an airtight container in the refrigerator. Add the sprinkles and candy eyes just before serving so they stay crisp and don’t bleed colors into the frosting.
For longer storage, freeze unfrosted brownies for up to three months. Wrap them tightly in plastic wrap, then aluminum foil. Thaw overnight in the refrigerator before decorating. However, I don’t recommend freezing already-decorated brownies because the frosting texture can become grainy and the candy eyes may lose their adhesive backing.
If you’re making these for a school event or party where you can’t control the temperature, consider using a buttercream-style frosting rather than store-bought whipped frosting. Buttercream holds up better in warm conditions and won’t melt as quickly.
Notes
Brownie Mix Selection: While any brownie mix works, I prefer the fudgy varieties over cake-like ones for these monster brownies. The denser texture holds up better under frosting and provides a more satisfying chocolate flavor. Ghirardelli and Betty Crocker Supreme are my go-to brands.
Food Coloring Tips: Gel or paste food coloring produces the most vivid monster colors without adding extra liquid to your frosting. If you only have liquid food coloring, you may need to use quite a bit to get bright colors, which can thin out the frosting. In that case, refrigerate the tinted frosting for 15-20 minutes to firm it back up before spreading.
Candy Eye Alternatives: If you can’t find candy eyes or want to try something different, use M&Ms, white chocolate chips with a dot of black frosting, or even draw eyes with edible markers. Mini Oreos split in half also make hilarious googly eyes!
Cutting Clean Squares: For the cleanest cuts, chill the frosted brownies for 30 minutes before slicing. Use a large, sharp knife dipped in hot water and wiped dry between each cut. This prevents the frosting from dragging and creates professional-looking edges.
Storage: Keep leftover Monster Mash Brownies in an airtight container at room temperature for up to three days. If your kitchen is particularly warm, store them in the refrigerator, but bring them to room temperature before serving for the best texture.
Allergy Considerations: Check your brownie mix for allergens if serving to a group. Many contain eggs, dairy, and wheat. Fortunately, allergy-friendly versions are increasingly available and work just as well in this recipe.
Frequently Asked Questions
Can I make these without food coloring?
Absolutely! The brownies taste just as delicious with plain white frosting. You can also use naturally colored frostings by adding beet powder for pink/red, spirulina for green, or purple sweet potato powder for purple hues. They won’t be as vibrant as gel colors, but they’re a great natural alternative.
How do I prevent the frosting from tearing the brownie when I spread it?
Make sure your brownies are completely cool first—this is crucial. Use a soft frosting (slightly warmer than fridge temperature works best) and apply it gently with an offset spatula using light pressure. Start with a thin layer to “crumb coat” the brownies, then add more frosting on top. If the brownie keeps tearing, try spreading the frosting on each individual piece after cutting instead of frosting the whole pan.
Will the candy eyes stick if I don’t use frosting?
The frosting acts as edible glue for the candy eyes and sprinkles. Without it, decorations won’t adhere properly. However, if you want to skip frosting, you could dust the brownies with powdered sugar and press the candy eyes directly into the warm brownies right after baking—they’ll sink in slightly and stay put as the brownies cool.
Can I use homemade frosting instead of store-bought?
Definitely! A simple buttercream or cream cheese frosting works beautifully. Just make sure it’s thick enough to hold the decorations without being too stiff to spread. If your homemade frosting is too thin, add more powdered sugar; if it’s too thick, add a teaspoon of milk at a time until you reach the right consistency.
What if I don’t have a 9×13 pan?
You can use a different size pan, but you’ll need to adjust the baking time. An 8×8 pan makes thicker brownies that need about 5-10 minutes longer baking time. Two 8-inch round pans work too—just frost and decorate them as circular monster cakes! Check doneness with a toothpick regardless of pan size.
How far in advance can I decorate these?
For the best results, decorate them within 24 hours of serving. The candy eyes can sometimes lose their “stick” if left on the frosting for too long, and sprinkles may bleed colors slightly. If you must decorate further ahead, keep them refrigerated and bring to room temperature before serving.
My candy eyes keep sliding off. What am I doing wrong?
This usually happens if the frosting is too thin or too warm. Make sure you’re using a thicker frosting consistency, and if needed, refrigerate it for 10-15 minutes before decorating. Press the candy eyes gently but firmly into the frosting rather than just placing them on top. Once the frosting sets (about 30 minutes at room temperature), they should stay put perfectly.
Can kids help make these?
This is one of the best recipes for little helpers! Kids can stir the brownie batter, help pour it into the pan, and especially love the decorating part. Just handle the hot oven yourself and make sure the brownies are completely cool before letting kids frost and add the candy eyes. It’s messy, fun, and creates wonderful memories!