There’s something magical about slicing into a vibrant red velvet cake topped with clouds of cream cheese frosting. I still remember the first time I made this sheet cake version for a family gathering—the gasps of delight when I brought it to the table were unforgettable. Unlike traditional layer cakes that require precision stacking and crumb coating, this sheet cake delivers all the classic red velvet flavor with half the fuss. Moreover, it’s perfect for feeding a crowd without spending hours in the kitchen.
The beauty of a sheet cake lies in its simplicity and convenience. You can bake it in one pan, frost it right in that same pan, and serve it directly without any complicated transfers. Additionally, the larger surface area means more of that tangy cream cheese frosting to go around—and let’s be honest, that’s everyone’s favorite part.
Why You’ll Love This Red Velvet Sheet Cake
It’s incredibly moist and tender. The combination of buttermilk, oil, and a touch of cocoa creates a cake with an irresistibly soft crumb that melts in your mouth. Furthermore, the vinegar reacts with the baking soda to give the cake its signature light texture.
The flavor balance is perfection. Red velvet isn’t chocolate cake, nor is it vanilla—it occupies that delicious middle ground with subtle cocoa notes and a hint of tanginess. Meanwhile, the cream cheese frosting provides the ideal sweet and tangy contrast that makes every bite memorable.
It feeds a crowd effortlessly. This recipe yields generous servings for 20 to 24 people, making it ideal for birthdays, potlucks, holidays, or any celebration. In addition, the sheet cake format makes portioning and serving a breeze.
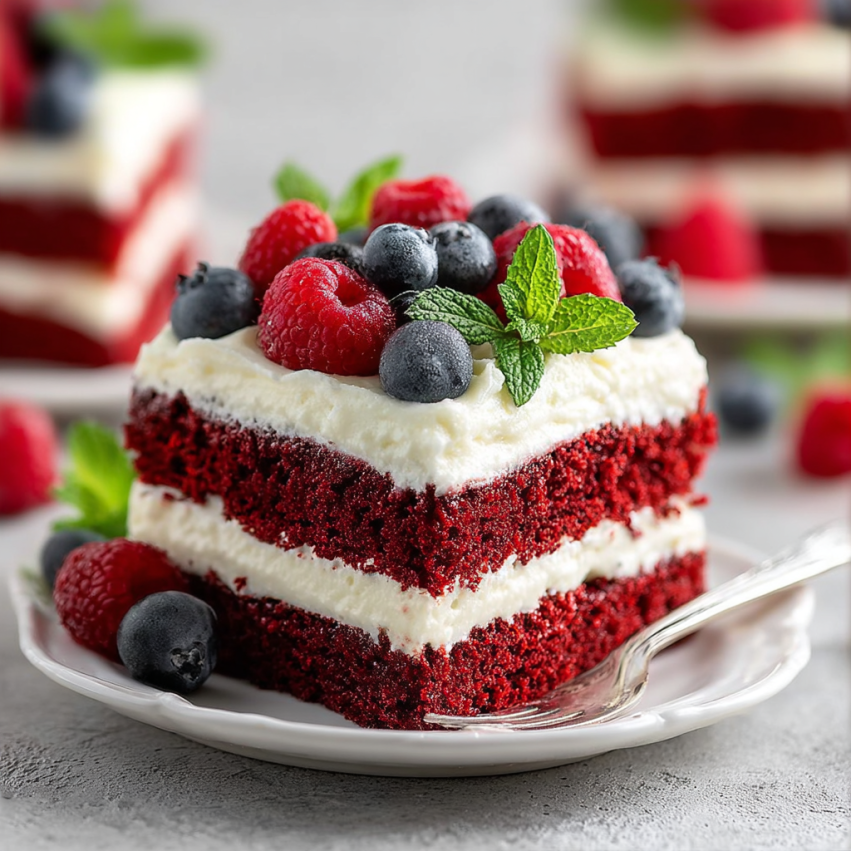
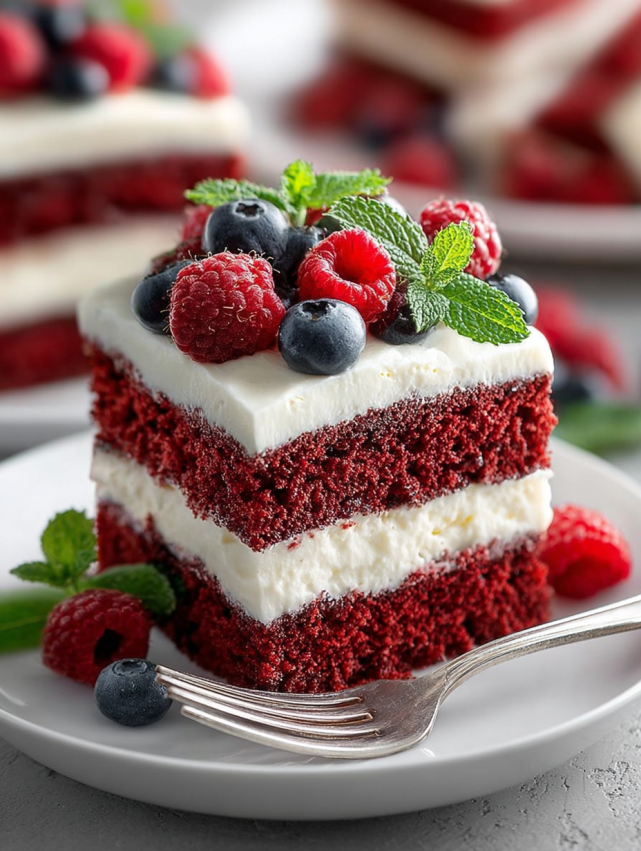
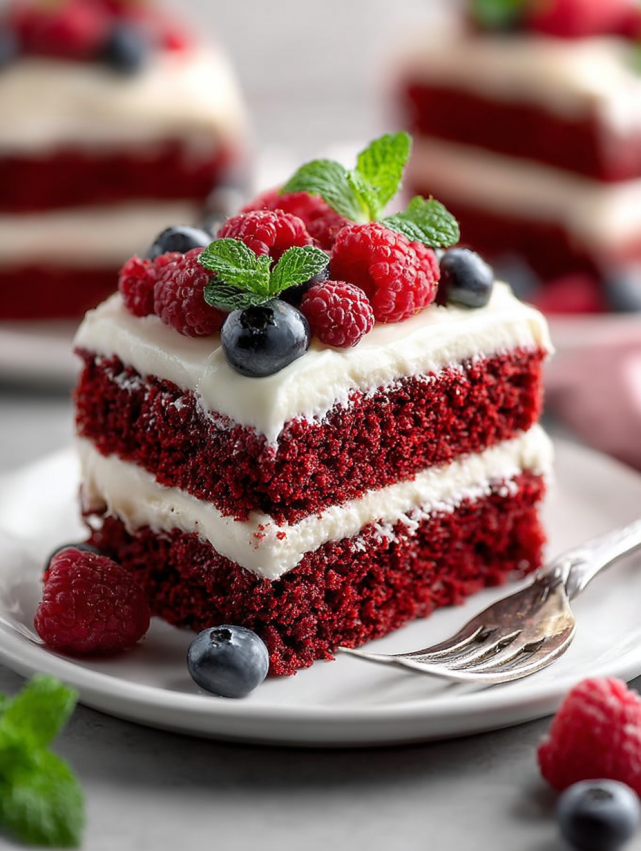
It’s visually stunning. The vibrant red color against the white frosting creates a show-stopping presentation. Topped with fresh berries, it becomes an Instagram-worthy masterpiece that tastes as good as it looks.
Make-ahead friendly for stress-free entertaining. You can bake this cake a day in advance and store it unfrosted, then add the frosting a few hours before serving. Consequently, you’ll have more time to enjoy your guests instead of being stuck in the kitchen.
Ingredients You’ll Need
For the Red Velvet Cake
- 2 1/2 cups all-purpose flour – Provides structure while keeping the cake tender
- 1 1/2 cups granulated sugar – Adds sweetness and helps create that soft texture
- 1 teaspoon baking soda – Works with the vinegar for proper rise and fluffiness
- 1 teaspoon unsweetened cocoa powder – Gives subtle chocolate undertones without overpowering
- 1/2 teaspoon salt – Enhances all the flavors and balances sweetness
- 1 1/2 cups vegetable oil – Keeps the cake incredibly moist for days
- 1 cup buttermilk, room temperature – Adds tanginess and contributes to the tender crumb
- 2 large eggs, room temperature – Binds everything together and adds richness
- 2 tablespoons red food coloring – Creates that signature vibrant red hue
- 1 teaspoon white vinegar – Reacts with baking soda for the perfect rise
- 1 1/2 teaspoons pure vanilla extract – Rounds out the flavor profile beautifully
For the Cream Cheese Frosting
- 8 ounces cream cheese, softened – The star of the show; must be room temperature
- 1 stick (1/2 cup) unsalted butter, softened – Adds richness and helps achieve spreadability
- 3 1/2 cups powdered sugar, sifted – Sweetens and thickens the frosting
- 1 1/2 teaspoons pure vanilla extract – Enhances the overall flavor
- Pinch of salt – Balances the sweetness perfectly
- 1 to 2 tablespoons heavy cream – Adjusts consistency to your preference
For Garnish
- Fresh raspberries – Add tartness and beautiful color contrast
- Fresh blueberries – Provide bursts of freshness and elegance
How to Make Red Velvet Sheet Cake
Preparing the Pan and Oven
Start by preheating your oven to 350°F to ensure even baking from the moment the cake goes in. Next, grease a 13×18-inch half-sheet pan thoroughly with butter or cooking spray, paying special attention to the corners. Then, line the pan with parchment paper, allowing a few inches to overhang on the sides—this creates handles for easy cake removal later.
Mixing the Dry Ingredients
In a large mixing bowl, sift together the all-purpose flour, granulated sugar, baking soda, unsweetened cocoa powder, and salt. Sifting is crucial because it eliminates lumps and aerates the flour, resulting in a lighter cake texture. Use a whisk to combine everything evenly, ensuring the cocoa powder is distributed throughout without any dark streaks.
Combining the Wet Ingredients
In a separate bowl, whisk together the vegetable oil, buttermilk, eggs, red food coloring, white vinegar, and vanilla extract. Whisk vigorously until the mixture becomes smooth and fully incorporated—you shouldn’t see any streaks of egg or separated oil. The vibrant red color will be quite striking at this stage, so don’t be alarmed by the intensity.
Bringing It All Together
Gradually pour the wet mixture into the bowl of dry ingredients, folding gently with a rubber spatula or wooden spoon. The key here is to use a light hand and fold just until the ingredients are combined and no flour pockets remain. Overmixing can develop the gluten in the flour, leading to a tougher, denser cake instead of the tender crumb we’re after.
Baking to Perfection
Pour the batter into your prepared pan, using an offset spatula to spread it evenly into all corners. This ensures uniform thickness and even baking throughout. Slide the pan into your preheated oven and bake for 20 to 25 minutes, checking for doneness around the 20-minute mark. The cake is ready when a toothpick inserted into the center comes out clean or with just a few moist crumbs, and the surface springs back when lightly pressed.
Cooling Properly
Once baked, remove the cake from the oven and place the pan on a wire cooling rack. Allow it to cool in the pan for 15 to 20 minutes—this prevents the cake from breaking apart when you remove it. After this initial cooling period, use the parchment paper overhang to carefully lift the cake out of the pan and transfer it to the wire rack. Let it cool completely before frosting, as warm cake will melt the frosting and create a mess.
Making the Cream Cheese Frosting
While the cake cools, prepare your frosting. In a large bowl, beat the softened cream cheese and butter together using an electric mixer on medium speed until the mixture becomes light and fluffy—this usually takes about 2 to 3 minutes. Gradually add the sifted powdered sugar, about one cup at a time, beating well after each addition. Mix in the vanilla extract and a pinch of salt, then add 1 to 2 tablespoons of heavy cream to achieve your desired consistency. The frosting should be spreadable but not runny.
Frosting and Decorating
Once the cake has cooled completely, spread the cream cheese frosting evenly across the top using an offset spatula. Work from the center outward, creating smooth, even coverage. Finally, arrange fresh raspberries and blueberries across the frosted surface in whatever pattern appeals to you—you can create neat rows, scatter them randomly, or arrange them in a decorative border around the edges.
Serving Suggestions
This red velvet sheet cake shines at any gathering, but presentation matters. Cut the cake into neat squares or rectangles using a sharp knife, wiping the blade clean between cuts for professional-looking slices. Serve each piece on a small dessert plate with a dollop of extra frosting on the side if desired.
For an elevated presentation, pair each slice with a small scoop of vanilla ice cream or a swirl of whipped cream. The cold, creamy addition complements the rich cake beautifully. Alternatively, dust the berries lightly with powdered sugar just before serving for an elegant touch.
Coffee and tea are natural companions to red velvet cake. Brew a pot of your favorite coffee or offer a selection of black and herbal teas. The slight bitterness of coffee balances the sweetness perfectly, while vanilla or berry-flavored teas echo the cake’s flavor profile.
For special occasions, consider adding sparklers or candles if it’s a birthday celebration. The dramatic red color makes this cake photograph beautifully, so encourage guests to snap pictures before diving in.
Recipe Variations to Try
Chocolate Chip Red Velvet
Fold 1 cup of mini chocolate chips into the batter just before pouring it into the pan. The chocolate adds little pockets of richness throughout the cake, creating an even more indulgent dessert.
White Chocolate Raspberry Version
Add 1/2 cup of white chocolate chips to the batter and press fresh raspberries into the frosting instead of just placing them on top. This creates beautiful berry swirls and adds tartness throughout.
Red Velvet Brownies
For a denser, fudgier treat, reduce the baking time to 18 to 20 minutes and slightly underbake the cake. The result will be more brownie-like in texture with that characteristic red velvet flavor.
Nutty Delight
Toast 1 cup of chopped pecans or walnuts and sprinkle them over the frosting along with the berries. The nuts add wonderful crunch and a complementary flavor that pairs beautifully with cream cheese.
Coconut Red Velvet
Mix 1 cup of sweetened shredded coconut into the frosting and toast another 1/2 cup to sprinkle on top. This variation adds tropical flair and interesting texture.
Cookies and Cream Style
Crush 15 Oreo cookies and fold half into the batter, then sprinkle the remaining half over the frosted cake. This creates a fun twist that kids and adults alike will devour.
Make-Ahead and Storage Tips
Baking in Advance
You can bake the cake layer up to two days ahead of time. After it cools completely, wrap it tightly in plastic wrap, then in aluminum foil, and store it at room temperature. This actually allows the flavors to develop and meld together, often resulting in an even more delicious cake.
Frosting Ahead
Prepare the cream cheese frosting up to three days in advance and store it in an airtight container in the refrigerator. Before using, let it sit at room temperature for about 30 minutes, then give it a quick stir to restore its spreadable consistency.
Freezing Options
The unfrosted cake freezes beautifully for up to three months. Wrap it well in plastic wrap and aluminum foil, then place it in a freezer-safe container or bag. Thaw it overnight in the refrigerator, then bring it to room temperature before frosting and serving.
For the frosted cake, you can freeze individual slices by placing them on a baking sheet until solid, then transferring them to freezer bags. This way, you can pull out single servings whenever a craving strikes—they’ll thaw in about 30 minutes at room temperature.
Refrigerator Storage
Once frosted, this cake should be stored in the refrigerator due to the cream cheese frosting. Cover it loosely with plastic wrap or store it in an airtight container. It will stay fresh for up to five days, though it rarely lasts that long in my house! Before serving refrigerated cake, let it sit at room temperature for 20 to 30 minutes to take the chill off.
Important Notes for Success
Room temperature ingredients are crucial. Cold eggs and buttermilk won’t incorporate properly into the batter, potentially resulting in an uneven texture. Set these items out about an hour before you start baking.
Don’t skip sifting the powdered sugar for the frosting. Lumpy frosting is disappointing and looks unprofessional. Taking the extra minute to sift makes all the difference in achieving that silky-smooth finish.
Gel food coloring works better than liquid. If you want a deeper, more vibrant red color, consider using gel-based food coloring instead of the liquid variety. Gel colors are more concentrated, so you’ll need less to achieve that classic red velvet hue.
The cocoa powder adds flavor, not chocolate. Red velvet should have just a hint of cocoa—it’s not meant to taste like chocolate cake. The small amount provides depth and a slight earthiness that balances the sweetness.
Watch the baking time carefully. Because this is a thin sheet cake, it bakes relatively quickly. Start checking at the 20-minute mark to avoid overbaking, which can dry out the cake. Every oven is different, so use the toothpick test as your guide.
Softened cream cheese means truly soft. If your cream cheese is too cold, the frosting will have lumps. If it’s too warm, the frosting will be runny. Aim for cream cheese that yields easily when pressed but still holds its shape.
Frequently Asked Questions
Can I use natural food coloring instead of artificial dyes?
Absolutely! Natural red food coloring made from beets or other plant-based sources works well, though the color may be slightly less vibrant. You might need to use a bit more to achieve the classic red velvet appearance. Some bakers also use beet powder, which adds a subtle earthiness that complements the cocoa.
Why is my cake dry even though I followed the recipe?
Overbaking is the most common culprit for dry cake. Even one or two extra minutes can make a difference with sheet cakes. Additionally, make sure you’re measuring flour correctly by spooning it into the measuring cup and leveling it off, rather than scooping directly from the bag, which can pack in too much flour.
Can I make this without buttermilk?
Yes! Create a buttermilk substitute by adding 1 tablespoon of white vinegar or lemon juice to regular milk and letting it sit for 5 minutes. Alternatively, thin some plain yogurt with a splash of milk until it reaches the consistency of buttermilk. Both options work beautifully in this recipe.
How do I know when the cake is done baking?
Look for three signs: the cake should pull away slightly from the sides of the pan, spring back when lightly touched in the center, and a toothpick inserted in the middle should come out clean or with just a few moist crumbs. Trust the toothpick test more than the timer, as ovens vary.
Can I halve this recipe for a smaller pan?
Definitely! Halve all ingredients and bake in a 9×13-inch pan using the same temperature and timing. Start checking for doneness around 20 minutes, as the slightly thicker cake may need an extra minute or two.
My frosting is too runny. How can I fix it?
Add more powdered sugar, about 1/4 cup at a time, until it reaches the right consistency. Alternatively, refrigerate the frosting for 15 to 20 minutes to firm it up. If it becomes too thick, add a teaspoon of heavy cream at a time to thin it out.
Can I make this cake without eggs?
Yes, though the texture will be slightly different. Replace each egg with a “flax egg” (1 tablespoon ground flaxseed mixed with 3 tablespoons water, left to sit for 5 minutes) or use a commercial egg replacer according to package directions.
How far in advance can I frost the cake?
For best results, frost the cake no more than 24 hours before serving. The frosting will remain fresh and beautiful, but any longer and it may start to absorb moisture from the cake, affecting both texture and appearance.
What can I use instead of vegetable oil?
Canola oil, melted coconut oil, or light olive oil all work well. Avoid strongly flavored oils as they’ll compete with the delicate red velvet flavor. Melted butter is another option, though it will make the cake slightly denser.
Why is the vinegar necessary?
Vinegar reacts with the baking soda to create air bubbles, which helps the cake rise and achieve its characteristic light, tender texture. It also enhances the tanginess that’s signature to red velvet cake. Don’t skip it—you won’t taste it in the final product.