Halloween parties at our house have always been about two things: creativity and comfort food. Last year, my kids helped me transform ordinary sandwiches into creepy coffins, and honestly, they disappeared faster than any candy bowl. There’s something magical about taking everyday ingredients and turning them into something delightfully spooky. These coffin sandwiches became the star of our Halloween spread, and I’ve been making them ever since.
The best part? You don’t need any special equipment or culinary expertise. Just a sharp knife, regular sandwich ingredients, and a little imagination. Whether you’re hosting a costume party, packing school lunches, or looking for a fun family activity, these sandwiches deliver both on presentation and taste.
Why You’ll Love These Coffin Sandwiches
They’re ridiculously easy to make. Unlike elaborate Halloween treats that require hours of decorating, these come together in about 15 minutes. Even kids can help with the assembly, making it a perfect family project.
Customization is endless. From classic turkey and cheese to vegetarian options with hummus and veggies, everyone gets exactly what they want. Picky eaters? No problem—just adjust the fillings to suit each person’s preferences.
The wow factor is unbeatable. Guests always do a double-take when they see these on the table. Something about that coffin shape instantly sets the Halloween mood without looking too scary for younger children.
What You’ll Need
Main Ingredients
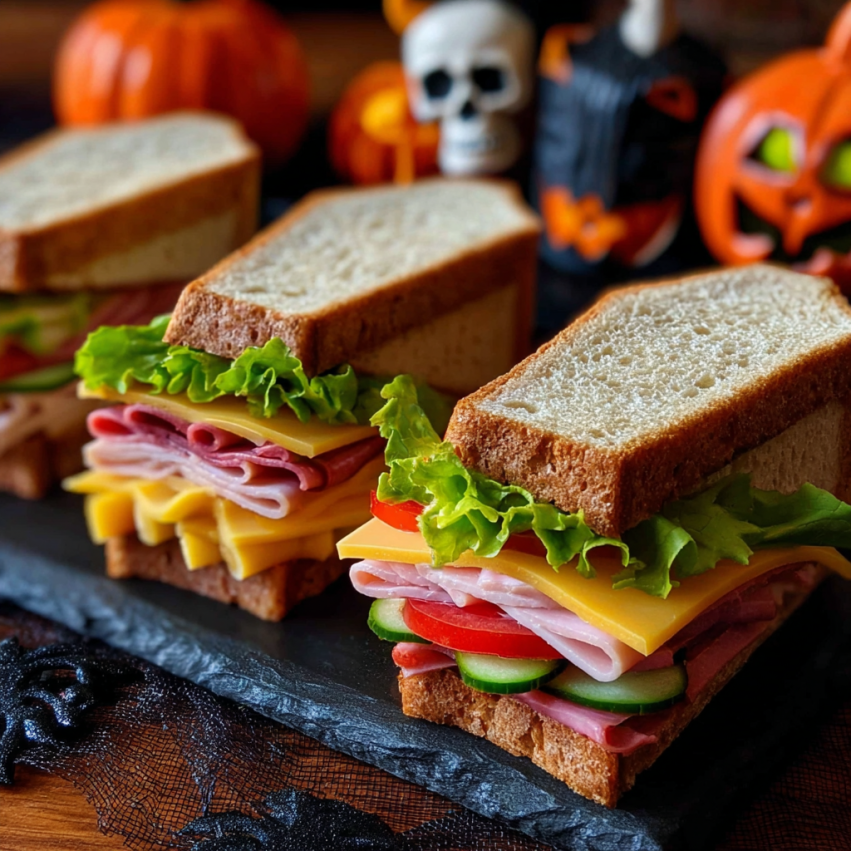
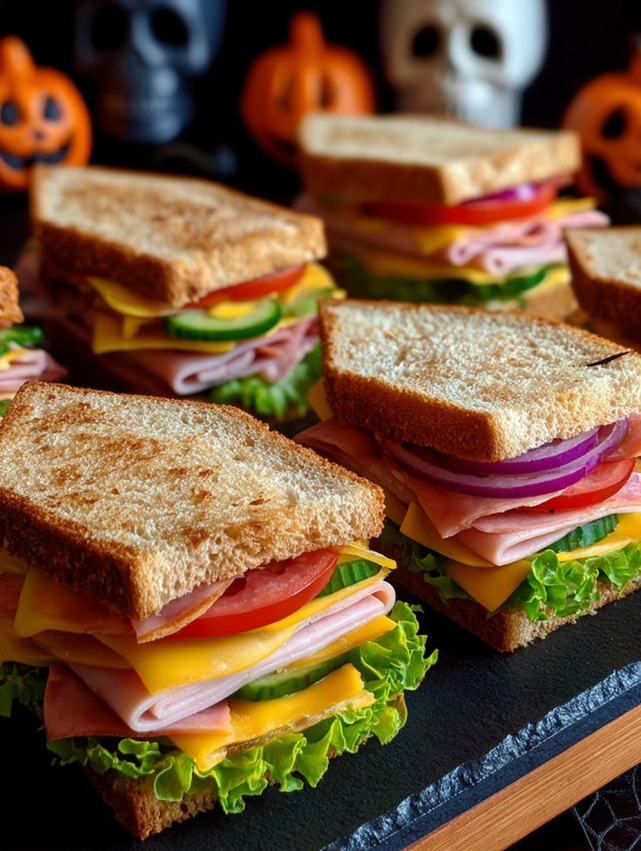
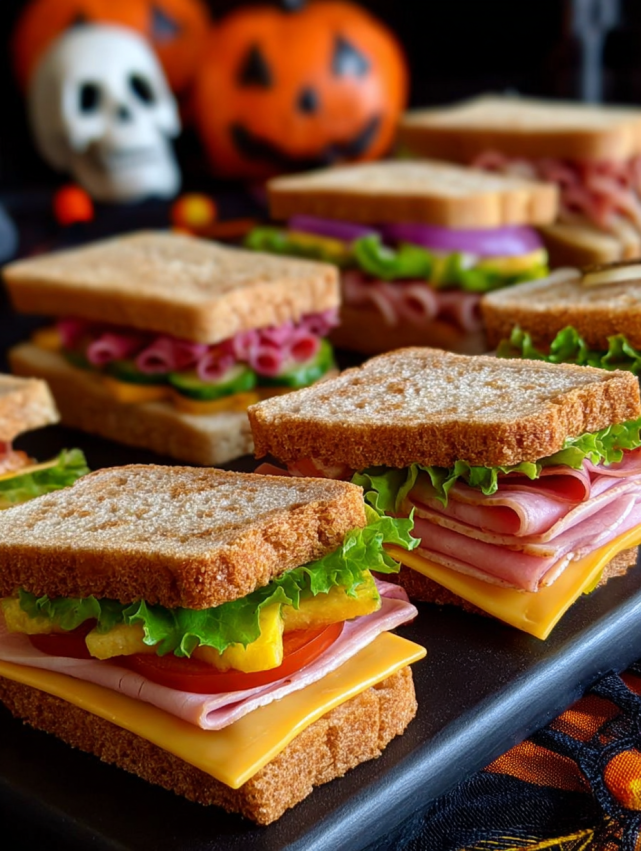
Bread (8 slices) – White or whole wheat sandwich bread works perfectly. Choose a sturdy bread that won’t fall apart when cut into shapes. Slightly firmer bread holds up better during trimming.
Protein (4 slices) – Deli turkey or chicken provides lean, flavorful options. You can also use ham, roast beef, or even vegetarian deli slices depending on your preferences.
Cheese (4 slices) – Cheddar brings sharp flavor, provolone offers mild creaminess, and Swiss adds a classic touch. Mix and match based on what your crowd enjoys most.
Produce – Fresh lettuce leaves add crunch and color. Tomato slices bring juiciness, while cucumber offers a refreshing alternative. Both work beautifully in these sandwiches.
Spread – Mayonnaise creates a creamy base, mustard adds tangy zip, and chipotle mayo brings a smoky kick. Choose one or offer a variety for customization.
Optional Additions
Butter – A light coating on the outside transforms these into warm, golden toasted sandwiches with melted cheese. This step takes them from good to absolutely irresistible.
Step-by-Step Instructions
Creating the Coffin Shape
Start by laying your bread slices flat on a cutting board. Using a sharp knife, carefully trim each slice into a coffin shape. Begin by tapering the sides inward, then create a slight angle at the top to form that distinctive coffin silhouette. Don’t worry about perfection—each coffin can have its own character, which actually adds to the spooky charm.
Pro tip: Stack two slices together while cutting to ensure they match up perfectly when assembled. This saves time and creates more uniform sandwiches.
Building Your Sandwich
Spread your chosen condiment evenly across one side of each bread slice. This creates a moisture barrier that prevents soggy bread. Next, layer on a crisp lettuce leaf, letting it peek out slightly from the edges for visual interest.
Add one slice of deli meat, folding it slightly to create dimension rather than laying it completely flat. Place your cheese slice on top, followed by several tomato or cucumber slices arranged in a single layer. Finally, crown your creation with the second coffin-shaped bread slice.
The Toasting Option
For those who love a warm, melty sandwich, this step is essential. Lightly spread butter on both outer sides of each assembled sandwich. Heat a skillet or panini press over medium heat until it’s nice and hot.
Place your sandwiches carefully in the pan and let them toast for 2–3 minutes per side. Watch for that beautiful golden-brown color to develop. The cheese should melt completely, creating gooey deliciousness in every bite. If using a skillet, press down gently with a spatula for even browning.
Final Presentation
Arrange your coffin sandwiches on a large platter or serving board. Now comes the fun part—decorating! Scatter artificial spiders around the plate, drape some fake cobwebs across the corners, or position skeleton hands reaching toward the sandwiches. These little touches transform a simple snack into a full Halloween experience.
Serving Suggestions
Serve these immediately after assembly for the crispest texture, especially if you’ve toasted them. Pair your coffin sandwiches with themed sides like “witch finger” veggie sticks, “monster eye” deviled eggs, or a bowl of orange and black tortilla chips.
For drinks, consider “witches’ brew” punch or apple cider served in cauldron-style bowls. Creating a complete Halloween spread makes the entire meal feel cohesive and festive.
Set up a DIY sandwich bar where guests can build their own coffins. Lay out all the ingredients separately along with pre-cut bread shapes. This interactive approach works especially well for kids’ parties, giving everyone control over their creation.
Creative Variations to Try
Breakfast Coffins
Swap traditional lunch ingredients for scrambled eggs, crispy bacon, and melted American cheese. These breakfast versions make Halloween morning extra special and keep everyone fueled for a day of festivities.
Vegetarian Delight
Layer hummus, roasted red peppers, cucumber, sprouts, and avocado for a plant-based option. Add a smear of pesto for extra flavor depth. These taste fresh and satisfying without any meat.
Italian-Style
Use focaccia bread instead of sandwich bread for a more artisan feel. Fill with salami, mozzarella, roasted peppers, and a drizzle of balsamic glaze. The Italian flavors create a sophisticated twist on the spooky theme.
Sweet Dessert Coffins
Transform this concept into dessert by using pound cake or bread slices. Spread with Nutella or peanut butter, then add sliced strawberries and bananas. These sweet coffins appeal to kids who want something less savory.
Make-Ahead Tips
Cut your bread into coffin shapes the night before and store them in an airtight container or zip-top bag. This prevents them from drying out while saving you precious time on party day. Just avoid pre-spreading condiments, as this can make the bread soggy.
Prep all your fillings in advance by slicing cheese, washing lettuce, and portioning deli meat into individual servings. Store everything in separate containers in the refrigerator. When it’s time to serve, assembly becomes quick and stress-free.
If you plan to toast the sandwiches, wait until right before serving. Pre-toasted sandwiches lose their appealing crispness and can become chewy. However, you can butter the bread ahead of time and keep it ready to hit the pan.
Important Notes
For guests with gluten sensitivities, simply substitute gluten-free sandwich bread. Most brands hold up well when cut into shapes, though they may be slightly more delicate during trimming. Handle them gently and use a very sharp knife for clean cuts.
The bread-to-filling ratio matters more than you might think. Too much filling makes the coffin shape harder to see and can cause ingredients to slide out. Stick to moderate portions that maintain the visual impact while still tasting satisfying.
Room temperature ingredients meld together better than cold ones straight from the fridge. If time allows, let your cheese and deli meat sit out for about 15 minutes before assembling. This small step improves both flavor and texture.
Frequently Asked Questions
Can I make these sandwiches the night before?
While you can prep all the components ahead, I don’t recommend assembling complete sandwiches more than 2-3 hours in advance. The bread tends to get soggy from the produce and condiments. Instead, prepare everything separately and assemble just before your event starts. This ensures maximum freshness and crunch.
What’s the best way to cut the coffin shape without making a mess?
Use a sharp serrated knife and gentle sawing motions rather than pressing straight down. Start by visualizing the shape—wider at the top, tapering toward the bottom with angled corners at the head. Some people find it helpful to trace the shape lightly with a butter knife first as a guide. Remember, imperfect coffins still look perfectly spooky!
How do I keep the sandwiches from falling apart during serving?
Secure each sandwich with a decorative Halloween toothpick or small skewer through the center. This not only holds everything together but adds another fun element to the presentation. Black or orange picks work especially well with the theme.
Can I use different types of bread for variety?
Absolutely! Rye bread creates darker, more ominous-looking coffins. Sourdough adds tangy flavor and rustic texture. Pumpernickel gives you almost black coffins that look incredibly dramatic. Just make sure whatever bread you choose is sturdy enough to hold its shape after cutting.
What if I don’t have a panini press for toasting?
A regular skillet works just as well—I actually prefer it because you have more control over the heat. You can also use a grill pan for those attractive grill marks, or even pop them under the broiler for a minute on each side. Just watch them carefully to prevent burning.
Are there any nut-free spread options for school parties?
Yes! Sunflower seed butter makes an excellent alternative to peanut butter for sweeter versions. For savory sandwiches, stick with mayonnaise, mustard, or cream cheese—all naturally nut-free. Always check labels though, as some brands process foods in facilities with nuts.
How many sandwiches should I plan per person?
For a party with other food available, plan on one full sandwich (two coffin halves) per person. If these are the main attraction, bump it up to two sandwiches per guest. Kids typically eat one, while adults might want one and a half. It’s always better to have a few extras than to run short!