There’s something magical about Halloween that brings out the kid in all of us. Last year, my niece asked if we could make “the scariest but cutest” treats for her school party, and these mummy cupcakes were born. Watching her little eyes light up as we wrapped frosting “bandages” around each cupcake was a moment I’ll treasure forever. The best part? She kept insisting the mummies looked “too friendly,” so we added extra chocolate “stitches” to make them properly spooky.
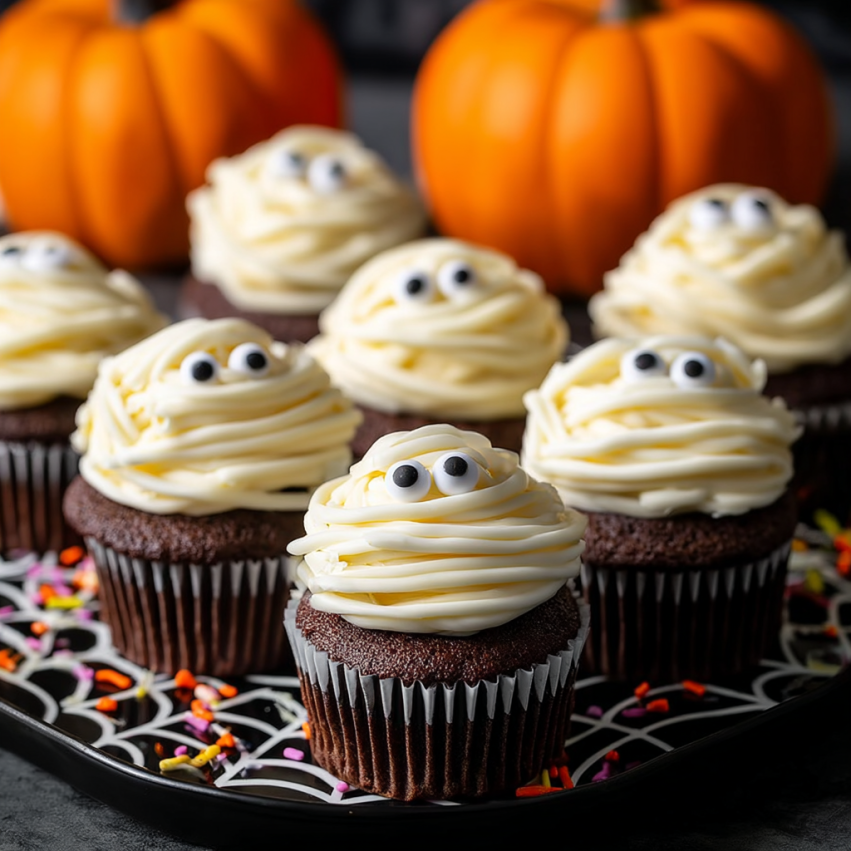
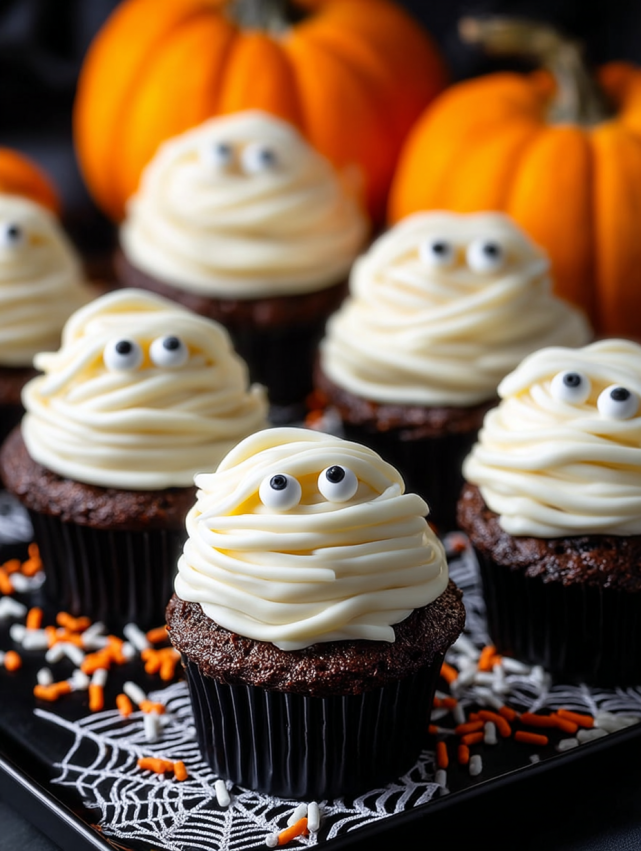
These adorable mummy cupcakes have become my go-to Halloween treat because they’re surprisingly easy to make, yet they never fail to impress. Whether you’re planning a Halloween party, need classroom treats, or simply want to celebrate the season with something fun, these bandaged beauties are guaranteed crowd-pleasers.
Why You’ll Love This Recipe
Simple Yet Impressive: Despite their elaborate appearance, these cupcakes require minimal decorating skills. The piping technique is forgiving, and honestly, the messier the bandages look, the more authentic they appear!
Kid-Friendly Fun: This recipe doubles as an activity. Children absolutely love placing the candy eyeballs and watching the mummies come to life. My nephew still talks about the “eyeball wars” we had last Halloween when he snuck extras from the bag.
Flexible Timeline: You can bake the cupcakes days in advance and decorate them the morning of your event. This flexibility has saved me countless times when juggling multiple party preparations.
Customizable Spook Factor: Want cute mummies for younger kids? Keep them simple with just eyes and bandages. Hosting a teen party? Add dramatic chocolate drips, extra stitches, or even red food coloring for a “bloody” effect.
Allergy-Friendly Options: By choosing your cake base carefully, these cupcakes can accommodate various dietary needs. Gluten-free cake mixes work beautifully, and dairy-free buttercream makes them accessible to more guests.
Ingredients You’ll Need
For the Cupcake Base
- 1 box chocolate or vanilla cake mix (or 12 pre-baked cupcakes for ultimate convenience)
- Eggs, oil, and water as specified on the box instructions
- Alternatively, use your favorite homemade cupcake recipe
For the Frosting and Decoration
- 2 cups vanilla buttercream frosting (homemade or store-bought)
- White food coloring (optional, for a brighter white)
- 24 candy eyeballs (two per cupcake)
- Chocolate chips or chocolate ganache (optional, for stitches and details)
- Edible marker (black, optional for drawing details)
Serving Suggestions
Serve these mummy cupcakes on a platter dusted with cocoa powder to create a “tomb” effect. Alternatively, arrange them on a bed of crushed Oreos mixed with gummy worms for an extra-spooky graveyard scene. For drinks, pair them with apple cider, orange punch, or a simple hot chocolate bar where kids can customize their own drinks.
Step-by-Step Instructions
Baking the Cupcakes
Start by preparing your cupcake base according to the package instructions or your preferred recipe. Preheat your oven as directed, then line a 12-cup muffin tin with paper liners. Mix the batter until just combined—overmixing can lead to dense cupcakes.
Fill each liner about two-thirds full to allow room for rising. Bake according to package directions, usually 18-22 minutes, until a toothpick inserted in the center comes out clean. Once baked, remove them from the tin immediately and place them on a wire rack. This step is crucial because cupcakes need to cool completely before decorating, otherwise your frosting will melt into a sad puddle.
Preparing the Buttercream
While your cupcakes cool, prepare the frosting. Transfer your vanilla buttercream to a mixing bowl and beat it with an electric mixer for 2-3 minutes until it becomes light and fluffy. This aerates the frosting and makes it easier to pipe.
If you want a brighter white color, add 2-3 drops of white food coloring and mix thoroughly. However, I’ve found that regular vanilla buttercream works perfectly fine—it gives a slightly aged “bandage” look that’s actually quite authentic.
Creating the Mummy Eyes
Before you start piping bandages, place the eyes first. This might seem counterintuitive, but trust me on this one. Dab a tiny amount of frosting onto each cupcake where you want the eyes to sit—think about facial proportions here.
Gently press two candy eyeballs into the frosting dabs, positioning them close together for a cute look or farther apart for a sillier expression. The frosting acts as edible glue, holding the eyes securely in place.
Piping the Bandages
Now comes the fun part! Fill a piping bag fitted with a flat ribbon tip (a Wilton #47 or similar works beautifully) with your prepared buttercream. If you don’t have a piping bag, a ziplock bag with the corner snipped off works in a pinch, though the bandages won’t look quite as neat.
Starting from one side of the cupcake, pipe horizontal and diagonal lines across the surface, crisscrossing them randomly to mimic wrapped bandages. Leave the eyes completely visible—they’re the star of the show! Don’t worry about perfection here; real bandages are messy and uneven. In fact, varying the thickness and angle of your lines creates a more realistic effect.
Continue piping until the entire cupcake surface is covered, leaving just the eyes peeking through. Some gaps between bandages are perfectly fine and add to the mummy aesthetic.
Adding Spooky Details
For extra character, it’s time to add those finishing touches. Using a toothpick dipped in melted chocolate or chocolate ganache, draw small vertical lines crossing your frosting bandages to create “stitches.” These little details transform cute cupcakes into genuinely spooky treats.
Alternatively, place mini chocolate chips strategically to look like stitches or wounds. You can also use a black edible marker to draw cracks or additional shadows around the bandages. My favorite trick is adding a tiny bit of red food coloring mixed with frosting beneath one eye for a “bloody” effect—though save this for adult parties!
Setting the Frosting
Once decorated, place your cupcakes in the refrigerator for 10-15 minutes. This chilling time allows the buttercream to firm up, which prevents the bandages from smudging when you transport or handle them. Additionally, chilled cupcakes are easier to stack or arrange on serving platters.
Serving Suggestions
Presentation Ideas
Create a haunted graveyard display by arranging cupcakes on a black serving platter. Surround them with Milano cookies inserted vertically as “tombstones”—you can even write “RIP” on them with edible markers. Scatter crushed Oreos around the base as dirt, then add gummy worms peeking out for maximum creepy-crawly effect.
For a cleaner presentation, individual clear cupcake containers let each mummy shine while keeping them fresh. Tie orange and black ribbons around the containers for an extra festive touch. These also make fantastic party favors that guests can take home.
Pairing Suggestions
These sweet treats pair wonderfully with savory Halloween snacks. Serve them after a meal of “mummy dogs” (hot dogs wrapped in crescent roll dough), “witch finger” breadsticks, or “monster” veggie pizzas. The contrast between sweet cupcakes and savory dinner foods creates a well-rounded party menu.
For beverages, orange punch served in a cauldron-style bowl makes a dramatic centerpiece. You could also offer “witches’ brew” (lime sherbet floating in ginger ale), hot apple cider with cinnamon sticks, or for adults, a spiked pumpkin spice coffee bar.
Recipe Variations
Flavor Twists
While vanilla and chocolate are classics, don’t be afraid to experiment with different cake flavors. Red velvet creates a dramatic contrast with white bandages and adds a subtle “bloody” undertone that Halloween fans appreciate. Funfetti cupcakes bring extra festivity with colorful sprinkles peeking through the bandages.
For chocolate lovers, try a double chocolate base with chocolate buttercream bandages. Use brown food coloring in the frosting to create “ancient” mummies that look like they’ve just emerged from a dusty tomb. Top these with white chocolate eyes for stunning contrast.
Dietary Modifications
Making these cupcakes for guests with dietary restrictions? Gluten-free cake mixes work seamlessly in this recipe—just follow the package directions as you would with regular mix. The decoration process remains exactly the same.
For dairy-free versions, substitute regular buttercream with coconut oil-based frosting or dairy-free butter alternatives. Many store-bought “accidentally vegan” frostings pipe beautifully. Just ensure your candy eyeballs are gelatin-free if needed.
Size Variations
Mini mummy cupcakes make adorable bite-sized treats perfect for large parties where guests want to sample multiple desserts. Use a mini muffin tin and reduce baking time to 10-12 minutes. You’ll get about 24 mini mummies from one cake mix, and decorating them goes much faster.
Conversely, jumbo mummy cupcakes create statement desserts. Use a 6-cup jumbo muffin tin and increase baking time to 25-30 minutes. These larger versions give you more surface area for elaborate bandage designs and multiple sets of eyes if you want to create a “mummy family.”
Make-Ahead Tips
Advance Baking
These cupcakes are actually better when made ahead, as the flavors have time to develop and the cake texture becomes more tender. Bake your cupcakes up to three days in advance, then let them cool completely before storing them in an airtight container at room temperature.
If you’re really planning ahead, unfrosted cupcakes freeze beautifully for up to three months. Wrap each one individually in plastic wrap, then place them all in a freezer-safe container or bag. Thaw overnight in the refrigerator before decorating, and they’ll taste freshly baked.
Frosting Preparation
You can prepare your buttercream frosting up to one week ahead. Store it in an airtight container in the refrigerator, then bring it to room temperature and rewhip it before piping. This re-beating step is essential—it restores the fluffy texture and makes piping much easier.
If your make-ahead frosting seems too stiff, add a teaspoon of milk or water and beat again until it reaches piping consistency. Conversely, if it’s too soft, refrigerate it for 15-20 minutes to firm up.
Full Assembly Timeline
While you can fully decorate cupcakes 1-2 days ahead, I recommend assembling them the day of your event when possible. The candy eyeballs can sometimes “bleed” color slightly if sitting too long, especially in humid conditions. However, if you need to decorate in advance, store finished cupcakes in a single layer in the refrigerator, uncovered, until the frosting firms up completely, then loosely cover with plastic wrap.
For maximum freshness, bring refrigerated cupcakes to room temperature 30 minutes before serving. Cold cake is denser and less flavorful than room-temperature cake, so this step really elevates the eating experience.
Notas
Storage: Keep decorated cupcakes in an airtight container at room temperature for up to two days or refrigerated for up to four days. The frosting may soften slightly at room temperature in warm weather, so refrigeration is safer for summer Halloween parties.
Frosting Consistency: If your buttercream is too soft to hold the bandage shape, it needs more powdered sugar or time in the refrigerator. Conversely, if it’s too stiff to pipe smoothly, add milk one teaspoon at a time until it reaches the right consistency. The ideal texture should be similar to toothpaste—firm enough to hold shape but soft enough to pipe easily.
Piping Tips: Don’t have a ribbon or flat tip? A round tip (like Wilton #12) works too, though the bandages will look slightly different. You can even skip the piping bag entirely and spread frosting with a small offset spatula, then use a fork to create texture.
Eye Options: Can’t find candy eyeballs? Create your own by piping white frosting dots and adding mini chocolate chip centers. You could also use white M&Ms with a dot of black gel icing in the center. For a truly homemade look, fondant eyes work beautifully and can be made days ahead.
Dirt Effect: Crushing Oreos for “dirt” is easiest in a food processor, but a ziplock bag and rolling pin work just fine. Use the whole cookie—cream and all—for a lighter color, or scrape out the cream filling first for darker, more realistic dirt.
Quantity Adjustments: This recipe makes 12 cupcakes. For larger parties, simply double or triple all ingredients. One box of cake mix typically yields 24 cupcakes if you fill the liners slightly less full, which is actually perfect for parties.

Frequently Asked Questions
Can I use homemade cupcakes instead of a box mix? Absolutely! Any cupcake recipe you love will work perfectly. Just make sure they’re completely cooled before decorating. My grandmother’s vanilla recipe and brownie-based chocolate cupcakes both work beautifully with this decorating technique.
What if I don’t have a piping bag? No problem at all. Use a ziplock bag with a small corner snipped off—aim for about a quarter-inch opening. The bandages won’t be quite as flat and ribbon-like, but they’ll still look wonderfully mummy-esque. Another option is spreading frosting with a small knife and creating texture with a fork.
How do I keep the candy eyeballs from sliding off? The key is using enough frosting as “glue” underneath and allowing the decorated cupcakes to chill properly. That 10-15 minute refrigeration time is crucial for setting everything in place. If eyeballs are still sliding, your frosting might be too soft—add more powdered sugar to thicken it.
Can I make these nut-free for school parties? Yes! Just check that your cake mix, frosting, and candy eyeballs are produced in nut-free facilities. Most major brands offer nut-free options, but always read labels carefully. Betty Crocker and Duncan Hines both make excellent nut-free cake mixes.
How far in advance can I decorate these? While you can decorate them up to two days ahead, I’ve found that same-day decoration gives the best results. The frosting stays brighter white, and the overall appearance is fresher. However, if you’re short on time, decorating the night before works fine—just store them properly in the refrigerator.
What’s the best way to transport these to a party? A cupcake carrier with individual slots is ideal, as it prevents the mummies from touching and smudging. If you don’t have one, arrange them in a single layer in a large, shallow container. You can also place them in individual cupcake containers for easy transport and built-in party favors.
Can I freeze decorated cupcakes? While you can freeze the cupcakes themselves, I don’t recommend freezing them once decorated. The candy eyeballs and buttercream don’t thaw well—the eyes can become discolored and the frosting may separate. Instead, freeze unfrosted cupcakes and decorate after thawing.
What if my frosting is too white or too yellow? Both work beautifully! Bright white looks like fresh bandages, while cream-colored frosting gives an aged, authentic mummy appearance. If you prefer one over the other, adjust with white food coloring or leave it natural. There’s no wrong answer here—I’ve made both versions and kids love them equally.
How can I make these less sweet? Try using cream cheese frosting instead of buttercream—it has a tangy flavor that balances the sweetness. You could also use dark chocolate cake with less sweet frosting, or reduce the amount of bandages and leave more cake exposed. Some parents appreciate when I use half the amount of frosting for a less sugary treat.
What other decorations can I add? The possibilities are endless! Try adding black sugar crystals for texture, edible glitter for sparkle, or small fondant details like bandage clips or ancient hieroglyphics. Some decorators add plastic spider rings on top or position the cupcakes to look like they’re emerging from coffins made of Kit Kat bars.