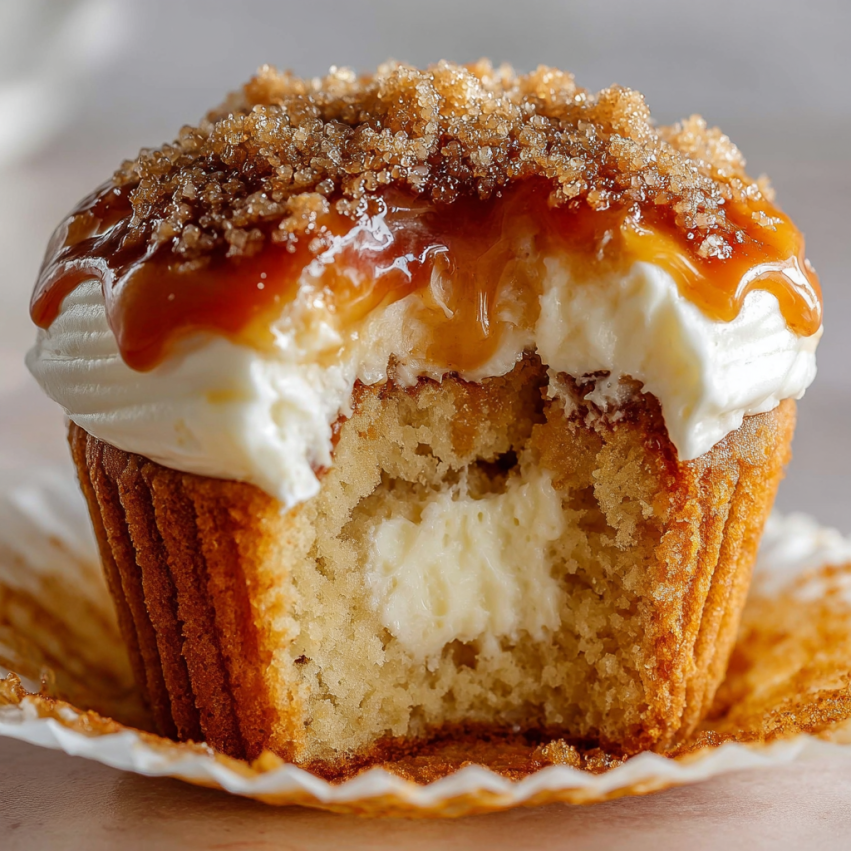
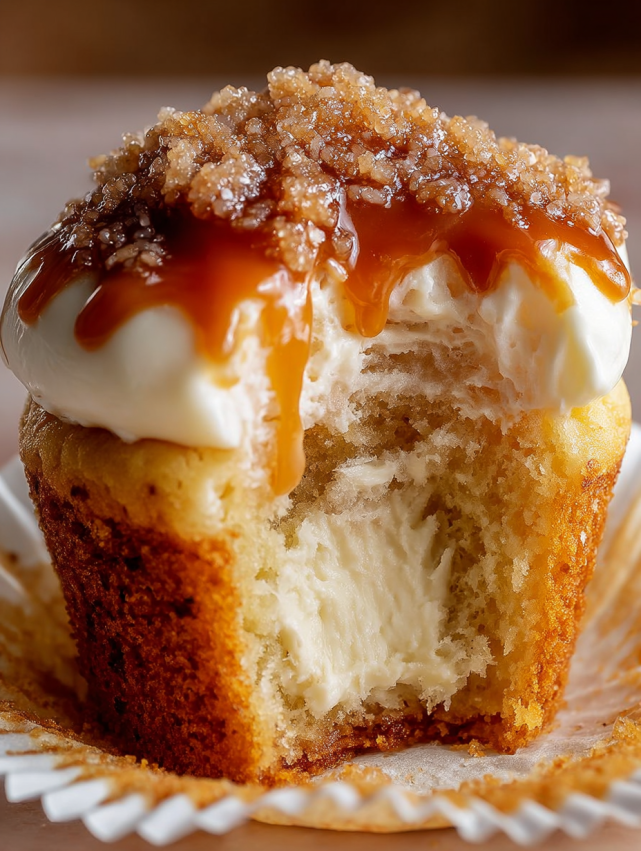
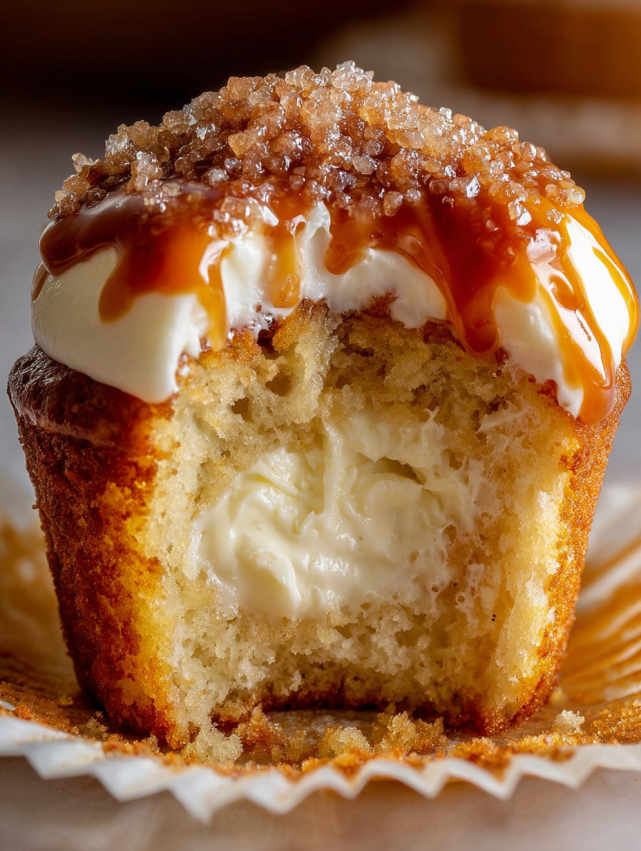
There’s something magical about the satisfying crack of caramelized sugar giving way to creamy, vanilla-flecked cheesecake underneath. I first attempted these cupcakes for my sister’s birthday, and honestly, I was terrified of the torching part. However, watching that sugar transform into a glossy, amber shell made me feel like a professional pastry chef. These individual-sized desserts combine the elegance of crème brûlée with the convenience of cupcakes, making them perfect for dinner parties where you want to impress without the stress of plating individual servings.
Why You’ll Love This Recipe
Restaurant-quality results at home – These cupcakes deliver all the sophistication of classic crème brûlée without requiring ramekins, water baths, or complicated techniques. The built-in graham cracker crust adds a delightful textural contrast that traditional crème brûlée lacks.
Make-ahead friendly – You can prepare these entirely the day before your event, then simply torch the tops just before serving. This flexibility means you’ll actually enjoy your own party instead of being stuck in the kitchen.
Perfectly portioned – Unlike a large cheesecake that requires slicing and plating, each guest gets their own beautifully caramelized cupcake. Additionally, the individual portions mean no arguments over who gets the biggest slice!
Impressive but approachable – While they look like they came from a fancy bakery, the actual process is surprisingly straightforward. Even novice bakers can achieve professional-looking results with this foolproof recipe.
Ingredients
For the Crust
- 180 g graham cracker crumbs (about 12-14 full crackers)
- 115 g unsalted butter, melted
- 50 g granulated sugar
For the Cheesecake Filling
- 450 g cream cheese, softened to room temperature
- 150 g granulated sugar
- 2 large eggs, room temperature
- 15 ml vanilla extract
- 15 ml vanilla bean paste or seeds from 1 vanilla bean
- 5 g all-purpose flour
- 1.25 g salt (about ¼ teaspoon)
- 80 ml sour cream, room temperature
For the Topping
- 50 g granulated sugar (for caramelizing)
Step-by-Step Instructions
Preparing Your Equipment
Set your oven to 163°C and line a 12-cup muffin tin with cupcake liners. This lower temperature ensures gentle, even baking that prevents cracks. Meanwhile, make sure all your dairy ingredients are at room temperature—this step is crucial for achieving that silky-smooth texture.
Building the Crust
Combine graham cracker crumbs, melted butter, and sugar in a medium bowl. Stir thoroughly until the mixture resembles wet sand and every crumb is coated in butter. This binding ensures your crust will hold together beautifully instead of crumbling apart.
Press about 1 tablespoon of the crust mixture firmly into the bottom of each cupcake liner. Use the back of a spoon or a small glass to pack it down tightly. Bake for 5–7 minutes until the crusts turn lightly golden and fragrant. Remove from the oven and let them cool while you prepare the filling.
Making the Creamy Filling
Beat the softened cream cheese in a large bowl using an electric mixer on medium speed until completely smooth and fluffy, about 2 minutes. Scrape down the sides of the bowl to ensure no lumps remain.
Gradually add the sugar and continue beating until well incorporated. The mixture should look pale and airy. Next, add the eggs one at a time, beating on low speed after each addition just until combined. Overmixing at this stage can incorporate too much air, which leads to cracks during baking.
Stir in the vanilla extract, vanilla bean paste, flour, salt, and sour cream. Mix on low speed until the filling becomes silky and uniform. Those beautiful vanilla bean specks should be evenly distributed throughout the batter.
Baking the Cupcakes
Divide the cheesecake filling evenly among the prepared liners, filling each about three-quarters full. A cookie scoop or small ladle makes this process neat and ensures consistent portions. Gently tap the muffin tin on the counter a few times to release any air bubbles.
Bake for 20–25 minutes until the centers are set but still have a slight jiggle when you gently shake the pan. The tops should not brown. Remember, cheesecake continues to set as it cools, so slightly underbaked is better than overbaked.
The Cooling Process
Turn off the oven but leave the cupcakes inside with the door closed for 10 minutes. This gradual temperature change prevents the sudden shock that causes cracking. After 10 minutes, transfer the muffin tin to a wire rack and let the cupcakes cool for another 10 minutes at room temperature.
Cover the tin loosely with plastic wrap and refrigerate for at least 1 hour, though overnight is even better. The chilling time allows the flavors to meld and the texture to become perfectly creamy.
Creating the Signature Crackle
Just before serving, sprinkle an even layer of sugar over each cupcake—about 1 teaspoon per cupcake works perfectly. Using a kitchen torch, hold the flame about 2-3 inches from the surface and move it in small circular motions. The sugar will bubble, darken, and transform into a glossy caramel shell within 30-60 seconds per cupcake.
Allow the caramelized sugar to cool for 2-3 minutes until it hardens completely. This creates that iconic crème brûlée crack when you tap it with a spoon.
Serving Suggestions
Serve these cupcakes chilled for the best texture contrast between the cold, creamy filling and the warm, crisp sugar topping. For an elegant presentation, place each cupcake on a small dessert plate with a few fresh berries scattered around it. Raspberries and blueberries provide beautiful color and a tart counterpoint to the rich sweetness.
A small dollop of whipped cream on the side adds visual appeal without overwhelming the star of the show. Alternatively, serve with a shot of espresso for a sophisticated coffee pairing that cuts through the richness beautifully.
For special occasions, garnish with a sprig of fresh mint or a dusting of edible gold leaf to elevate the presentation even further. These cupcakes are impressive enough to serve at weddings, anniversary dinners, or holiday celebrations.
Recipe Variations
Chocolate Crème Brûlée Cupcakes
Replace the graham cracker crust with chocolate cookie crumbs (like Oreos with filling removed). Add 60g of melted dark chocolate to the cheesecake filling for a decadent chocolate version that’s equally impressive.
Citrus-Infused Version
Incorporate the zest of one lemon or orange into the cheesecake filling along with the vanilla. The bright citrus notes provide a refreshing twist on the classic flavor profile.
Coffee Lover’s Edition
Add 15ml of espresso powder or strongly brewed coffee to the filling mixture. This creates a sophisticated tiramisu-meets-crème-brûlée flavor combination that coffee enthusiasts adore.
Berry Swirl Variation
Before baking, swirl 2-3 tablespoons of raspberry or strawberry puree into each filled cupcake liner using a toothpick. The fruit creates beautiful marbled patterns and adds a fruity dimension to each bite.
Make-Ahead Tips
These cupcakes are actually better when made ahead, as the flavors develop and deepen overnight. Prepare the cupcakes completely up to 3 days in advance, but wait to torch the sugar tops until just before serving—ideally no more than 1 hour ahead.
Store the un-torched cupcakes covered tightly in the refrigerator. The caramelized sugar will begin to soften and weep if left for more than a few hours, so timing that final torching step is key to maintaining the signature crackle.
For longer storage, you can freeze the baked cupcakes (without the sugar topping) for up to 1 month. Thaw them overnight in the refrigerator before torching and serving. The texture remains remarkably creamy even after freezing.
If you’re transporting these to an event, bring your kitchen torch and sugar with you to caramelize on-site. This ensures the topping stays perfectly crisp and impressive.
Notes
Temperature matters tremendously – Using room temperature cream cheese, eggs, and sour cream is non-negotiable for achieving that silky, lump-free texture. Cold ingredients won’t blend properly and can result in a grainy filling. Let everything sit on the counter for about 30-45 minutes before beginning.
Avoid overmixing – Once you add the eggs, mix on low speed and only until just combined. Excessive mixing incorporates too much air, which expands during baking and then collapses, causing those dreaded cracks on the surface.
Kitchen torch vs. broiler – A kitchen torch provides the best control and most consistent results for caramelizing the sugar. If you must use a broiler, watch extremely carefully as sugar can burn in seconds. Place the cupcakes on the top rack and broil for 1-2 minutes maximum, rotating the pan frequently. However, I strongly recommend investing in an inexpensive kitchen torch—they’re available for around $15-20 and make this process foolproof.
The jiggle test – Your cupcakes are done when the edges are set but the center still jiggles slightly when you gently shake the pan, similar to how Jello moves. They’ll continue cooking from residual heat and will firm up completely as they cool.
Sugar selection – Regular granulated sugar works perfectly for the caramelized topping. Superfine or caster sugar melts even more quickly and evenly, though it’s not essential. Avoid using brown sugar, as it won’t create the same glass-like shell.
FAQ
Can I make these without a kitchen torch?
Yes, though the results won’t be quite as perfect. Your broiler can work in a pinch—just watch them like a hawk because sugar goes from golden to burnt in literal seconds. Place your cupcakes on the top oven rack about 3-4 inches from the broiler element. Another option is to make a caramel separately on the stovetop and drizzle it over the cupcakes, though you’ll lose that satisfying crack.
Why did my cheesecake cupcakes crack?
Cracks usually happen for three reasons: overmixing after adding the eggs, baking at too high a temperature, or cooling too quickly. Make sure you’re mixing gently once the eggs go in, keeping your oven at that lower 163°C temperature, and allowing the gradual cooling process by leaving them in the turned-off oven. Room temperature ingredients also help prevent cracking because they blend more smoothly without requiring excessive mixing.
How far ahead can I torch the sugar?
Ideally, torch the sugar within 1-2 hours of serving for maximum crispness. The caramelized top will eventually start absorbing moisture from the refrigerator and become soft and sticky if left too long. If you’re preparing these for a party, torch them just before guests arrive or even as a fun table-side presentation.
Can I use low-fat cream cheese?
I wouldn’t recommend it for this recipe. Full-fat cream cheese provides the rich, creamy texture that makes these cupcakes special. Low-fat versions have higher water content and different stabilizers that can result in a grainy texture and less stable filling that might weep or separate.
What if I don’t have vanilla bean paste?
No problem! You can use vanilla extract alone—just increase it to 20ml total. Alternatively, scrape the seeds from one whole vanilla bean and add those along with the extract. The paste is convenient because it gives you those beautiful vanilla specks without the expense of whole beans, but extract works perfectly fine and the flavor will still be delicious.
My sugar won’t caramelize evenly. What am I doing wrong?
Make sure you’re applying a thin, even layer of sugar—too thick and the top will burn before the bottom melts. Also, keep your torch moving in small circles rather than holding it in one spot. The flame should be about 2-3 inches from the surface. If you’re still having trouble, try using superfine sugar, which melts more evenly than regular granulated.
Can I skip the crust?
Absolutely! The crust adds a nice textural contrast and helps prevent soggy bottoms, but these work fine as crustless cheesecake cupcakes. You might want to reduce the baking time by a minute or two since there’s no crust layer to bake first.
How do I know when they’re perfectly chilled?
After at least 1 hour in the refrigerator, the cupcakes should feel cold to the touch and the filling should be completely set. When you gently press the center, it should feel firm rather than soft or jiggly. Overnight chilling is ideal because it allows the texture to become even creamier and more cohesive.